Android位置API使您可以轻松构建位置感知应用程序,而无需关注基础位置技术的详细信息.
在 Google Play服务的帮助下成为可能,这有助于通过自动位置跟踪,地理围栏和活动识别为您的应用添加位置感知.
本教程显示如何在APP中使用位置服务来获取当前位置,获取定期位置更新,查找地址等.
位置对象表示一个地理位置,可以包括纬度,经度,时间戳和其他信息,如方位,高度和速度.您可以使用以下重要方法与Location对象一起获取位置特定信息 :
| Sr.No. | Method&描述 |
|---|---|
| 1 | float distanceTo(Location dest) 返回此位置与给定位置之间的近似距离. |
| 2 | float getAccuracy() 获取此位置的估计精确度,以米为单位. |
| 3 | double getAltitude() 获取高度(如果有),以米为单位海平面. |
| 4 | float getBearing() 以度为单位获取方位. |
| 5 | double getLatitude() 以度为单位获取纬度. |
| 6 | double getLongitude() 获取经度,以度为单位. |
| 7 | float getSpeed() 获取速度(如果可用),以米/秒为单位. |
| 8 | boolean hasAccuracy() 如果此位置具有准确性,则为真. |
| 9 | boolean hasAltitude() 如果此位置具有高度,则为真. |
| 10 | boolean hasBearing() 如果此位置有方位则为真. |
| 11 | boolean hasSpeed() 如果此位置有速度,则为真./p> |
| 12 | void reset() 清除该位置的内容. |
| 13 | void setAccuracy(float accuracy) 设置此位置的估计精度,米. |
| 14 | void setAltitude(double altitude) 设置海拔高度海拔高度. |
| 15 | void setBearing(float bearing) 设置轴承,单位为度. |
| 16 | void setLatitude(double latitude) 设置纬度,单位为度. |
| 17 | void setLongitude(double longitude) 设置经度,以度为单位. |
| 18 | void setSpeed(float speed) 设置速度,以米/秒为单位. |
| 19 | String toString() 返回包含的字符串这个对象的简洁,人类可读的描述. |
获得curr ent location,创建位置客户端 LocationClient 对象,使用 connect()方法将其连接到Location Services,然后调用其 getLastLocation()方法.此方法以位置对象的形式返回最近的位置,该对象包含纬度和经度坐标以及如上所述的其他信息.要在您的活动中使用基于位置的功能,您必须实现两个接口 :
GooglePlayServicesClient.ConnectionCallbacks
GooglePlayServicesClient.OnConnectionFailedListener
这些接口提供以下重要的回调方法,您需要在活动类中实现 :
| Sr.No. | 回调方法&描述 |
|---|---|
| 1 | abstract void onConnected(Bundle connectionHint) 当位置服务成功连接到位置客户端时,将调用此回调方法.您将使用 connect()方法连接到位置客户端. |
| 2 | abstract void onDisconnected() 当调用此回调方法时客户端断开连接.您将使用 disconnect()方法断开与位置客户端的连接. |
| 3 | abstract void onConnectionFailed(ConnectionResult result) 调用此回调方法将客户端连接到服务时出错. |
您应该创建位置客户端 onCreate()您的活动类的方法,然后将其连接到 onStart(),以便位置服务在您的活动完全可见时维护当前位置.您应该在 onStop()方法中断开客户端,以便在您的应用程序不可见时,位置服务不维护当前位置.这有助于在很大程度上节省电池电量.
如果您愿意进行位置更新,那么请分开从上面提到的接口,您还需要实现 LocationListener 接口.此接口提供以下回调方法,您需要在活动类中实现 :
| Sr.No. | 回调方法&描述 |
|---|---|
| 1 | abstract void onLocationChanged(Location location) 此回调方法用于在位置发生变化时从LocationClient接收通知. |
使用 LocationRequest 对象从 LocationClient 请求位置更新的服务质量(QoS).您可以使用以下有用的setter方法来处理QoS.您可以在Android官方文档中查看等效的getter方法.
| Sr.No. | Method&描述 |
|---|---|
| 1 | setExpirationDuration (long millis) 设置此请求的持续时间(以毫秒为单位). |
| 2 | setExpirationTime(long millis) 设置请求到期时间,自启动后以毫秒为单位. |
| 3 | setFastestInterval(long millis) 明确设置位置更新的最快间隔(以毫秒为单位). |
| 4 | setInterval(long millis) 设置活动位置更新所需的时间间隔(以毫秒为单位). |
| 5 | setNumUpdates(int numUpdates) 设置位置更新次数. |
| 6 | setPriority(int priority) 设置请求的优先级. |
现在例如,如果你的应用程序需要高精度位置它应该创建一个位置请求, setPriority(int)设置为PRIORITY_HIGH_ACCURACY, setInterval(long)为5秒.您还可以使用更大的时间间隔和/或其他优先级(如PRIORITY_LOW_POWER)来请求"城市"级别的准确性,或使用PRIORITY_BALANCED_POWER_ACCURACY来获得"阻止"级别的准确性.
活动应该强烈考虑删除所有位置请求时进入后台(例如在onPause()处),或者至少将请求交换到更大的间隔和更低的质量以节省功耗.
一旦有位置对象,就可以使用 Geocoder.getFromLocation()方法获取给定纬度和经度的地址.此方法是同步的,可能需要很长时间才能完成其工作,因此您应该从 AsyncTask 类的 doInBackground()方法调用该方法.
AsyncTask 必须使用子类,子类将覆盖 doInBackground(Params ...)方法以在后台执行任务在后台计算完成后,在UI线程上调用 onPostExecute(Result)方法,并显示结果. AyncTask中有一个更重要的方法是执行(Params ... params),此方法使用指定的参数执行任务.
下面的示例向您展示如何在您的应用中使用位置服务来获取当前位置及其等效地址等.
要进行实验在这个例子中,您将需要配备最新Android操作系统的实际移动设备,否则您将不得不努力使用可能无法正常工作的模拟器.
| Step | 描述 |
|---|---|
| 1 | 您将使用Android工作室IDE创建一个Android应用程序并将其命名为 com.example.it13527.myapplication 下的 Tutorialspoint . |
| 2 | add src/GPST racker.java 文件并添加所需的代码. |
| 3 | 修改 src/MainActivity.java 文件并添加所需的代码,如下所示,以便获取当前位置及其等效地址. |
| 4 | 修改布局XML文件 res/layout/activity_main.xml 以添加包含三个按钮的所有GUI组件两个文本视图显示位置/地址. |
| 5 | 修改 res/values/strings.xml 定义所需的常量值 |
| 6 | 修改 AndroidManifest.xml ,如下所示 |
| 7 | 运行应用程序以启动Android模拟器并验证应用程序中所做更改的结果. |
以下是修改后的主要活动文件 MainActivity.java 的内容.
package com.example.it13527.myapplication;

import android.Manifest;
import android.app.Activity;
import android.os.Bundle;
import android.support.v4.app.ActivityCompat;
import android.test.mock.MockPackageManager;
import android.view.View;
import android.widget.Button;
import android.widget.Toast;

public class MainActivity extends Activity {

   Button btnShowLocation;
   private static final int REQUEST_CODE_PERMISSION = 2;
   String mPermission = Manifest.permission.ACCESS_FINE_LOCATION;

   // GPSTracker class
   GPSTracker gps;

   @Override
   public void onCreate(Bundle savedInstanceState) {
      super.onCreate(savedInstanceState);
      setContentView(R.layout.activity_main);

      try {
         if (ActivityCompat.checkSelfPermission(this, mPermission)
            != MockPackageManager.PERMISSION_GRANTED) {

            ActivityCompat.requestPermissions(this, new String[]{mPermission},
               REQUEST_CODE_PERMISSION);

            // If any permission above not allowed by user, this condition will
               execute every time, else your else part will work
         }
      } catch (Exception e) {
         e.printStackTrace();
      }

      btnShowLocation = (Button) findViewById(R.id.button);

      // show location button click event
      btnShowLocation.setOnClickListener(new View.OnClickListener() {

         @Override
         public void onClick(View arg0) {
            // create class object
            gps = new GPSTracker(MainActivity.this);

            // check if GPS enabled
            if(gps.canGetLocation()){

               double latitude = gps.getLatitude();
               double longitude = gps.getLongitude();

               // \n is for new line
               Toast.makeText(getApplicationContext(), "Your Location is - \nLat: "
                  + latitude + "\nLong: " + longitude, Toast.LENGTH_LONG).show();
            }else{
               // can't get location
               // GPS or Network is not enabled
               // Ask user to enable GPS/network in settings
               gps.showSettingsAlert();
            }

         }
      });
   }
}
以下是修改后的主要活动文件 GPSTracker.java 的内容.
package com.example.it13527.myapplication;

import android.app.AlertDialog;
import android.app.Service;
import android.content.Context;
import android.content.DialogInterface;
import android.content.Intent;
import android.location.Location;
import android.location.LocationListener;
import android.location.LocationManager;
import android.os.Bundle;
import android.os.IBinder;
import android.provider.Settings;
import android.util.Log;

public class GPSTracker extends Service implements LocationListener {

   private final Context mContext;

   // flag for GPS status
   boolean isGPSEnabled = false;

   // flag for network status
   boolean isNetworkEnabled = false;

   // flag for GPS status
   boolean canGetLocation = false;

   Location location; // location
   double latitude; // latitude
   double longitude; // longitude

   // The minimum distance to change Updates in meters
   private static final long MIN_DISTANCE_CHANGE_FOR_UPDATES = 10; // 10 meters

   // The minimum time between updates in milliseconds
   private static final long MIN_TIME_BW_UPDATES = 1000 * 60 * 1; // 1 minute

   // Declaring a Location Manager
   protected LocationManager locationManager;

   public GPSTracker(Context context) {
      this.mContext = context;
      getLocation();
   }

   public Location getLocation() {
      try {
         locationManager = (LocationManager) mContext.getSystemService(LOCATION_SERVICE);

         // getting GPS status
         isGPSEnabled = locationManager.isProviderEnabled(LocationManager.GPS_PROVIDER);

         // getting network status
         isNetworkEnabled = locationManager
            .isProviderEnabled(LocationManager.NETWORK_PROVIDER);

         if (!isGPSEnabled && !isNetworkEnabled) {
            // no network provider is enabled
         } else {
            this.canGetLocation = true;
            // First get location from Network Provider
            if (isNetworkEnabled) {
               locationManager.requestLocationUpdates(
                  LocationManager.NETWORK_PROVIDER,
                  MIN_TIME_BW_UPDATES,
                  MIN_DISTANCE_CHANGE_FOR_UPDATES, this);

               Log.d("Network", "Network");
               if (locationManager != null) {
                  location = locationManager
                     .getLastKnownLocation(LocationManager.NETWORK_PROVIDER);

                  if (location != null) {
                     latitude = location.getLatitude();
                     longitude = location.getLongitude();
                  }
               }
            }

            // if GPS Enabled get lat/long using GPS Services
            if (isGPSEnabled) {
               if (location == null) {
                  locationManager.requestLocationUpdates(
                     LocationManager.GPS_PROVIDER,
                     MIN_TIME_BW_UPDATES,
                     MIN_DISTANCE_CHANGE_FOR_UPDATES, this);

                  Log.d("GPS Enabled", "GPS Enabled");
                  if (locationManager != null) {
                     location = locationManager
                        .getLastKnownLocation(LocationManager.GPS_PROVIDER);

                     if (location != null) {
                        latitude = location.getLatitude();
                        longitude = location.getLongitude();
                     }
                  }
               }
            }
         }

      } catch (Exception e) {
         e.printStackTrace();
      }

      return location;
   }

   /**
      * Stop using GPS listener
      * Calling this function will stop using GPS in your app
   * */

   public void stopUsingGPS(){
      if(locationManager != null){
         locationManager.removeUpdates(GPSTracker.this);
      }
   }

   /**
      * Function to get latitude
   * */

   public double getLatitude(){
      if(location != null){
         latitude = location.getLatitude();
      }

      // return latitude
      return latitude;
   }

   /**
      * Function to get longitude
   * */

   public double getLongitude(){
      if(location != null){
         longitude = location.getLongitude();
      }

      // return longitude
      return longitude;
   }

   /**
      * Function to check GPS/wifi enabled
      * @return boolean
   * */

   public boolean canGetLocation() {
      return this.canGetLocation;
   }

   /**
      * Function to show settings alert dialog
      * On pressing Settings button will lauch Settings Options
   * */

   public void showSettingsAlert(){
      AlertDialog.Builder alertDialog = new AlertDialog.Builder(mContext);

      // Setting Dialog Title
      alertDialog.setTitle("GPS is settings");

      // Setting Dialog Message
      alertDialog.setMessage("GPS is not enabled. Do you want to go to settings menu?");

      // On pressing Settings button
      alertDialog.setPositiveButton("Settings", new DialogInterface.OnClickListener() {
         public void onClick(DialogInterface dialog,int which) {
            Intent intent = new Intent(Settings.ACTION_LOCATION_SOURCE_SETTINGS);
            mContext.startActivity(intent);
         }
      });

      // on pressing cancel button
      alertDialog.setNegativeButton("Cancel", new DialogInterface.OnClickListener() {
         public void onClick(DialogInterface dialog, int which) {
            dialog.cancel();
         }
      });

      // Showing Alert Message
      alertDialog.show();
   }

   @Override
   public void onLocationChanged(Location location) {
   }

   @Override
   public void onProviderDisabled(String provider) {
   }

   @Override
   public void onProviderEnabled(String provider) {
   }

   @Override
   public void onStatusChanged(String provider, int status, Bundle extras) {
   }

   @Override
   public IBinder onBind(Intent arg0) {
      return null;
   }
}
以下是 res/layout/activity_main.xml 文件的内容&减号;
<?xml version = "1.0" encoding = "utf-8"?>
<LinearLayout xmlns:android = "http://schemas.android.com/apk/res/android"
   android:layout_width = "fill_parent"
   android:layout_height = "fill_parent"
   android:orientation = "vertical" >


   <Button
      android:id = "@+id/button"
      android:layout_width = "fill_parent"
      android:layout_height = "wrap_content"
      android:text = "getlocation"/>

</LinearLayout>
以下将是 res/values/strings.xml 的内容来定义两个新的常量 :
<?xml version = "1.0" encoding = "utf-8"?>
<resources>
   <string name = "app_name">Tutorialspoint</string>
</resources>
以下是 AndroidManifest.xml的默认内容 :
<?xml version = "1.0" encoding = "utf-8"?>
<manifest xmlns:android = "http://schemas.android.com/apk/res/android"
   package = "com.example.it13527.myapplication">
   <uses-permission android:name = "android.permission.ACCESS_FINE_LOCATION" />
   <uses-permission android:name = "android.permission.INTERNET" />
   <application
      android:allowBackup = "true"
      android:icon = "@mipmap/ic_launcher"
      android:label = "@string/app_name"
      android:supportsRtl = "true"
      android:theme = "@style/AppTheme">

      <activity android:name = ".MainActivity">
         <intent-filter>
            <action android:name = "android.intent.action.MAIN" />

            <category android:name = "android.intent.category.LAUNCHER" />
         </intent-filter>
      </activity>
   </application>

</manifest>
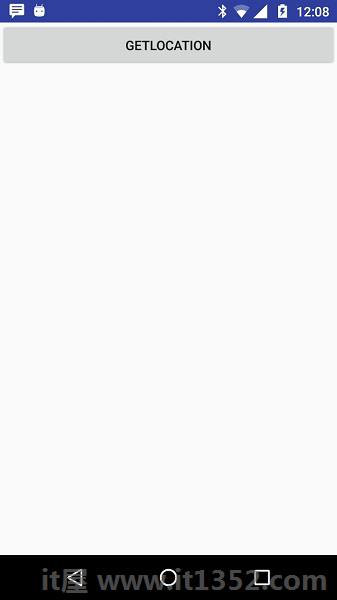
让我们尝试运行 Tutorialspoint 应用程序.我认为,您已将实际的Android移动设备与计算机相关联.要从Android Studio运行应用程序,请打开项目的一个活动文件,然后单击运行 icon从工具栏中.在开始申请之前,Android studio安装程序将显示以下窗口,以选择您要运行Android应用程序的选项.
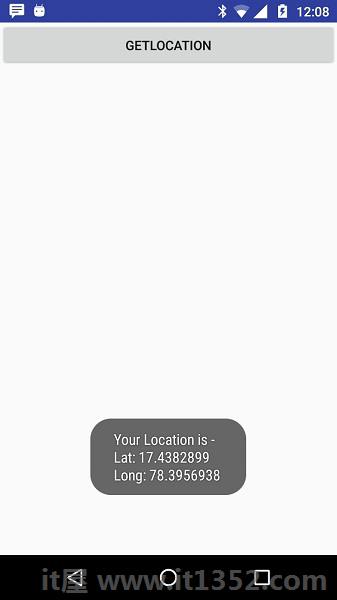
现在查看位置选择获取位置按钮,它将显示位置信息,如下所示;