在计算机编程中,单元测试是一种软件测试方法,通过该方法测试各个源代码单元以确定它们是否适合使用.换句话说,它是一个软件开发过程,其中应用程序的最小可测试部分(称为单元)被单独和独立地仔细检查以便正确操作.
在程序编程中,一个单元可以是一个完整的模块,但它通常是一个单独的功能或程序.在面向对象的编程中,单元通常是整个接口,例如类,但可以是单独的方法.
单元测试通常是自动化的,但也可以手动完成.
单元测试的主要目标是在应用程序中使用最小的可测试软件并确定其是否完全正常运行如你所料.在将每个单元集成到模块中以测试模块之间的接口之前,对每个单元进行单独测试.
让我们看一个单元测试的简单示例,其中我们创建一个新的ASP.NET MVC应用程序单元测试.
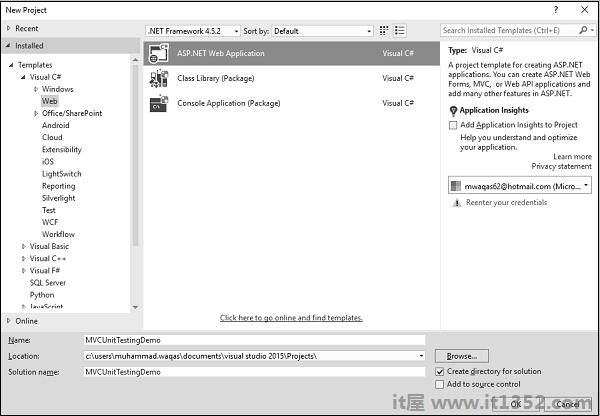
步骤1 : 打开Visual Studio,然后单击File → 新的 → 项目菜单选项.
打开一个新的项目对话框.
第2步 : 从左侧窗格中,选择模板> Visual C#>网站.
第3步 : 在中间窗格中,选择"ASP.NET Web应用程序".
步骤4 : 在"名称"字段中输入项目名称"MVCUnitTestingDemo",然后单击"确定"继续.您将看到以下对话框,要求您设置ASP.NET项目的初始内容.
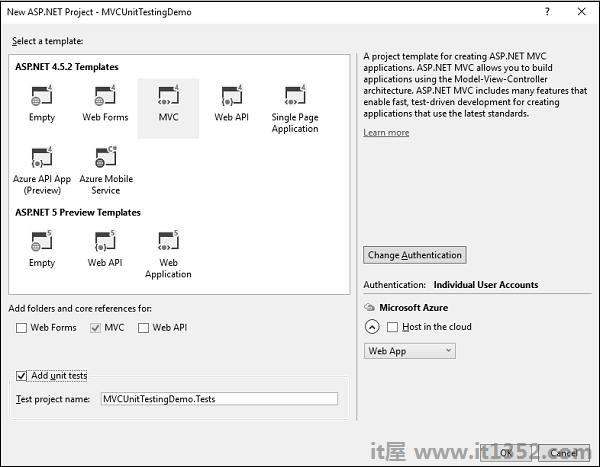
第5步 : 选择MVC作为模板,不要忘记选中对话框底部的Add unit tests复选框.您也可以更改测试项目名称,但在此示例中,我们保留原样,因为它是默认名称.
项目由Visual Studio创建后,您将看到解决方案资源管理器窗口中显示的许多文件和文件夹.
步骤6 : 您可以看到解决方案资源管理器中有两个项目.一个是ASP.NET Web项目,另一个是单元测试项目.
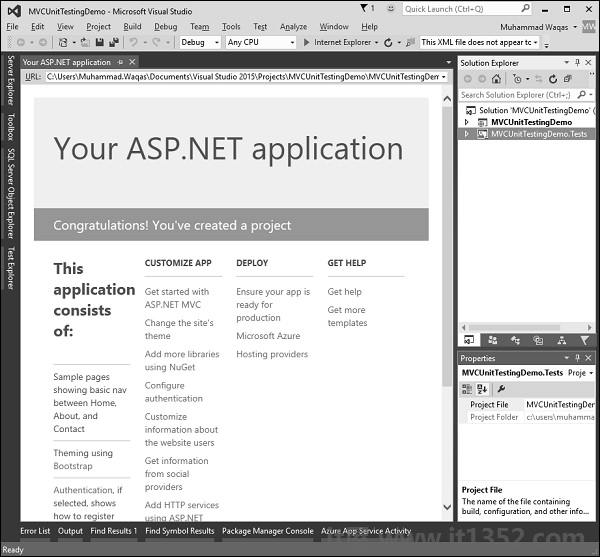
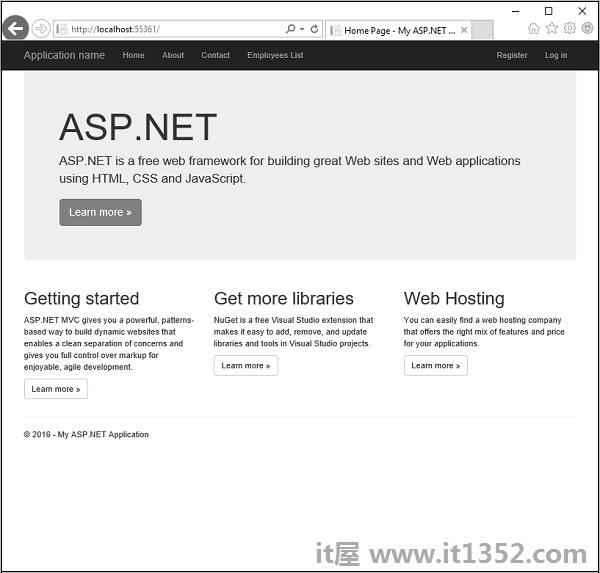
第7步 : 运行此应用程序,您将看到以下输出.

如上面的屏幕截图所示,导航栏上有Home,About和Contact按钮.让我们选择"关于",您将看到以下视图.

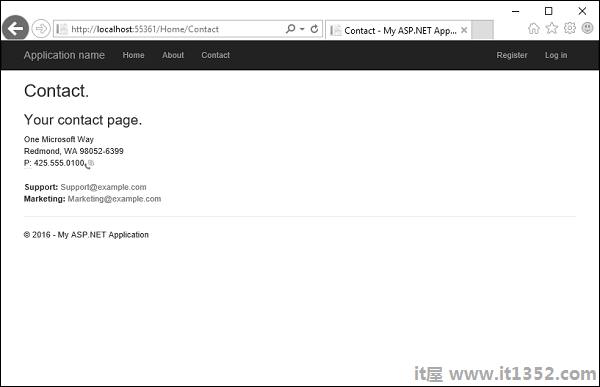
让我们选择联系人,弹出以下屏幕.
现在让我们展开'MVCUnitTestingDemo'项目,你会在Controllers文件夹下看到HomeController.cs文件.
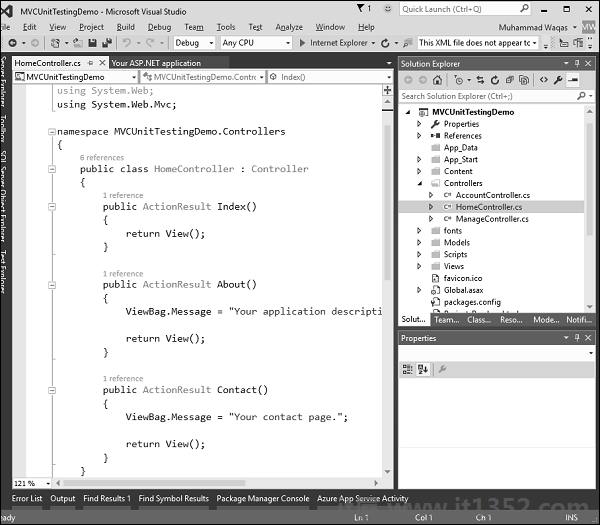
HomeController包含三种操作方法,如下面的代码所示.
using System;
using System.Collections.Generic;
using System.Linq;

using System.Web;
using System.Web.Mvc;

namespace MVCUnitTestingDemo.Controllers {
   public class HomeController : Controller{
      public ActionResult Index(){
         return View();
      }

      public ActionResult About(){
         ViewBag.Message = "Your application description page.";
         return View();
      }

      public ActionResult Contact(){
         ViewBag.Message = "Your contact page.";
         return View();
      }
   }
}
让我们展开 MVCUnitTestingDemo.Tests 项目,你会请参阅Controllers文件夹下的HomeControllerTest.cs文件.

在这个HomeControllerTest类中,您将看到以下代码中显示的三种方法.
using System;
using System.Collections.Generic;
using System.Linq;
using System.Text;

using System.Web.Mvc;
using Microsoft.VisualStudio.TestTools.UnitTesting;

using MVCUnitTestingDemo;
using MVCUnitTestingDemo.Controllers;

namespace MVCUnitTestingDemo.Tests.Controllers{
   [TestClass]
   public class HomeControllerTest{

      [TestMethod]
      public void Index(){
         // Arrange
         HomeController controller = new HomeController();
         // Act
         ViewResult result = controller.Index() as ViewResult;
         // Assert
         Assert.IsNotNull(result);
      }

      [TestMethod]
      public void About(){
         // Arrange
         HomeController controller = new HomeController();
         // Act
         ViewResult result = controller.About() as ViewResult;
         // Assert
         Assert.AreEqual("Your application description page.", result.ViewBag.Message);
      }

      [TestMethod]
      public void Contact(){
         // Arrange
         HomeController controller = new HomeController();
         // Act
         ViewResult result = controller.Contact() as ViewResult;
         // Assert
         Assert.IsNotNull(result);
      }
   }
}
这三种方法将测试Index,About和Contact操作方法是否正常工作.要测试这三种操作方法,请转到"测试"菜单.
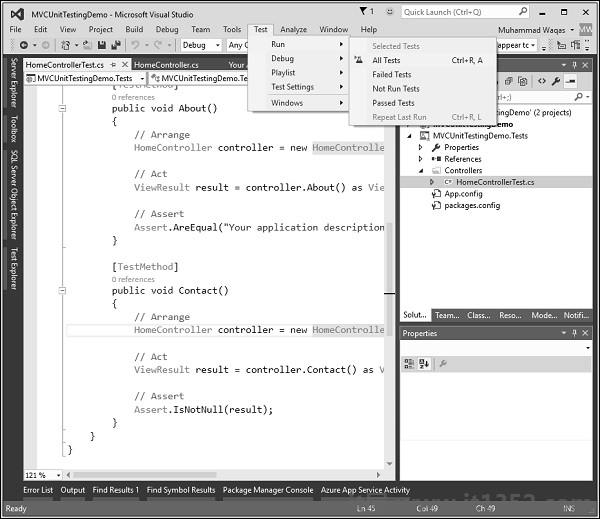
选择Run → 测试这些操作方法的所有测试.
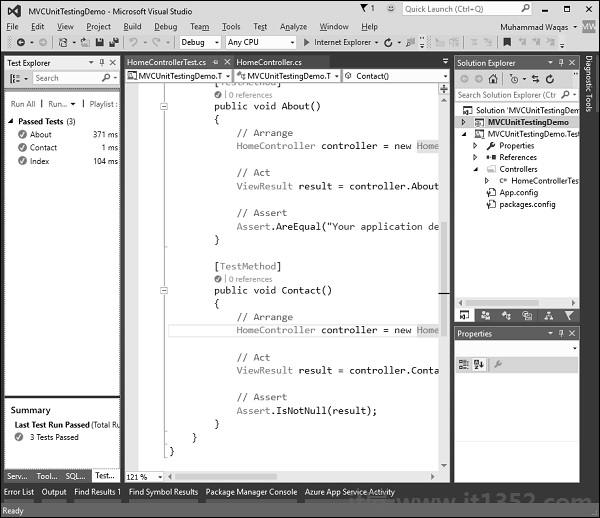
现在,您将看到左侧的Test Explorer,您可以在其中看到所有测试都已通过.让我们再添加一个操作方法,列出所有员工.首先,我们需要在Models文件夹中添加一个employee类.
以下是Employee类的实现.
using System;
using System.Collections.Generic;
using System.Linq;

using System.Web;

namespace MVCUnitTestingDemo.Models{
   public class Employee{
      public int ID { get; set; }
      public string Name { get; set; }
      public DateTime JoiningDate { get; set; }
      public int Age { get; set; }
   }
}
我们需要添加EmployeeController.右键单击解决方案资源管理器中的控制器文件夹,然后选择Add → 控制器.
它将显示Add Scaffold对话框.
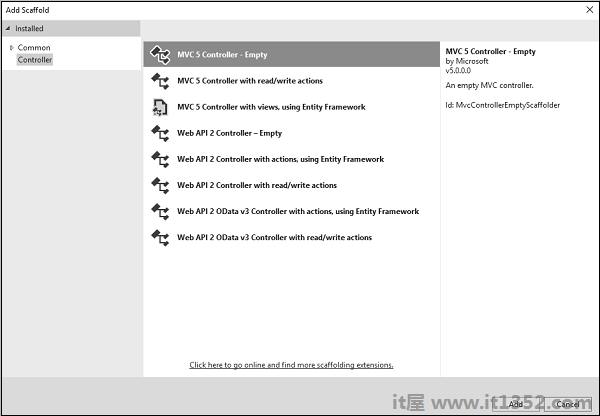
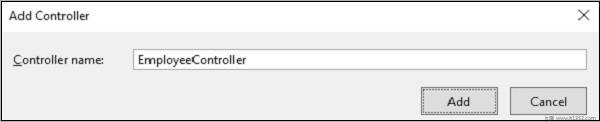
选择MVC 5控制器 - 空选项,然后单击"添加"按钮,将出现"添加控制器"对话框.
将名称设置为EmployeeController并单击"添加"按钮.
您将在Controllers文件夹中看到一个新的C#文件"EmployeeController.cs",该文件在Visual Studio中打开以进行编辑.让我们使用以下代码更新EmployeeController.
using MVCUnitTestingDemo.Models;
using System;
using System.Collections.Generic;
using System.Linq;

using System.Web;
using System.Web.Mvc;

namespace MVCUnitTestingDemo.Controllers {
   public class EmployeeController : Controller{
      [NonAction]

      public List<Employee> GetEmployeeList(){
         return new List<Employee>{
            new Employee{
               ID = 1,
               Name = "Allan",
               JoiningDate = DateTime.Parse(DateTime.Today.ToString()),
               Age = 23
            },

            new Employee{
               ID = 2,
               Name = "Carson",
               JoiningDate = DateTime.Parse(DateTime.Today.ToString()),
               Age = 45
            },

            new Employee{
               ID = 3,
               Name = "Carson",
               JoiningDate = DateTime.Parse(DateTime.Today.ToString()),
               Age = 37
            },

            new Employee{
               ID = 4,
               Name = "Laura",
               JoiningDate = DateTime.Parse(DateTime.Today.ToString()),
               Age = 26
            },
         };
      }

      // GET: Employee
      public ActionResult Index(){
         return View();
      }

      public ActionResult Employees(){
         var employees = from e in GetEmployeeList()
         orderby e.ID
         select e;
         return View(employees);
      }
   }
}
要添加View for Employees操作方法,请右键单击Employees操作并选择Add查看...
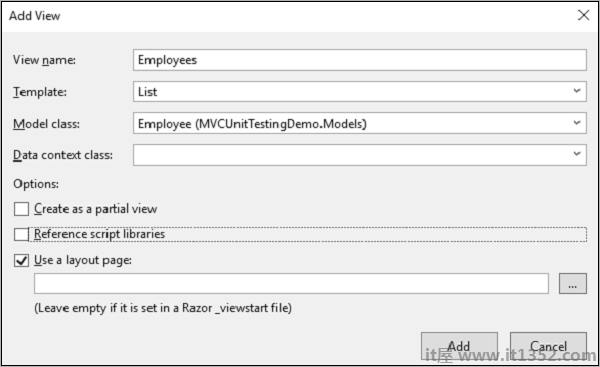
您将看到默认名称为了查看.从模板下拉列表中选择'List',从Model类下拉列表中选择'Employee',然后单击Ok.
现在我们需要添加Employees列表链接,让我们打开_layout.cshtml文件在Views/Shared文件夹下,在Contact链接下面添加员工列表链接.
<li>@Html.ActionLink("Employees List", "Employees", "Employee")</li>以下是_layout.cshtml的完整实现.
<!DOCTYPE html>
<html>
<head>
<meta charset = "utf-8" />
<meta name = "viewport" content = "width = device-width, initial-scale = 1.0">
<title>@ViewBag.Title - My ASP.NET Application</title>
@Styles.Render("~/Content/css")
@Scripts.Render("~/bundles/modernizr")
</head>
<body>
<div class = "navbar navbar-inverse navbar-fixed-top">
<div class = "container">
<div class = "navbar-header">
<button type = "button" class = "navbar-toggle" datatoggle =
"collapse" data-target = ".navbar-collapse">
<span class = "icon-bar"></span>
<span class = "icon-bar"></span>
<span class = "icon-bar"></span>
</button>
@Html.ActionLink("Application name", "Index", "Home", new
{ area = "" }, new { @class = "navbar-brand" })
</div>
<div class = "navbar-collapse collapse">
<ul class = "nav navbar-nav">
<li>@Html.ActionLink("Home", "Index", "Home")</li>
<li>@Html.ActionLink("About", "About", "Home")</li>
<li>@Html.ActionLink("Contact", "Contact", "Home")</li>
<li>@Html.ActionLink("Employees List", "Employees", "Employee")</li>
</ul>
@Html.Partial("_LoginPartial")
</div>
</div>
</div>
<div class = "container body-content">
@RenderBody()
<hr />
<footer>
<p>© @DateTime.Now.Year - My ASP.NET Application</p>
</footer>
</div>
@Scripts.Render("~/bundles/jquery")
@Scripts.Render("~/bundles/bootstrap")
@RenderSection("scripts", required: false)
</body>
</html>要从Employee控制器测试Employees操作方法,我们需要在单元测试项目中添加另一个测试方法.在EmployeeControllerTest类之后,我们将在其中测试Employees操作方法.
[TestClass]
public class EmployeeControllerTest{
   [TestMethod]
   public void Employees(){
      // Arrange
      EmployeeController controller = new EmployeeController();

      // Act
      ViewResult result = controller.Index() as ViewResult;

      // Assert
      Assert.IsNotNull(result);
   }
}
选择Run → 测试菜单中的所有测试都测试这些操作方法.
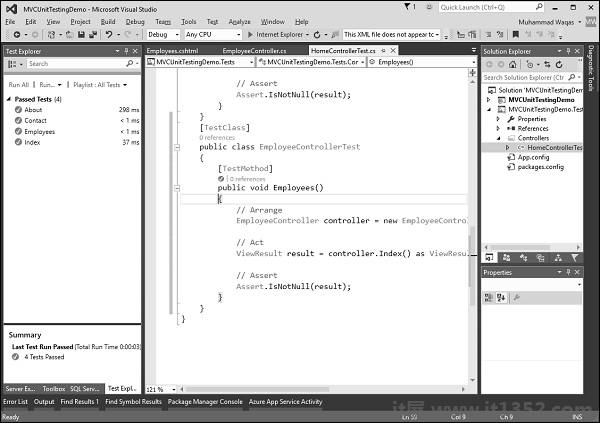
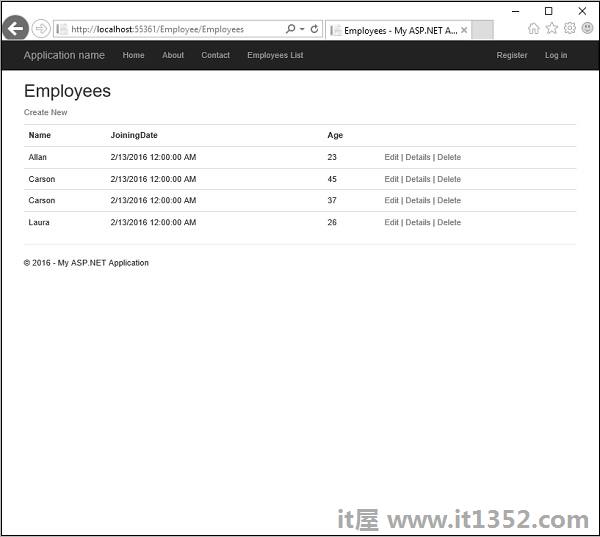
您可以看到现在也传递了Employees测试方法.当您运行该应用程序时,您将看到以下输出.
点击导航栏中的"员工列表"选项,您将看到员工列表.