动画使场景更具交互性,同时也令人印象深刻,给人以逼真的外观.现在让我们详细了解动画.我们将在形状上应用动画以将其从一个位置移动到另一个位置.要使用动画,您需要使用所需参数在动画上创建一个对象.
现在让我们看看相同和减号的语法;
var animationBox = new BABYLON.Animation(
   "myAnimation",
   "scaling.x",
   30,
   BABYLON.Animation.ANIMATIONTYPE_FLOAT,
   BABYLON.Animation.ANIMATIONLOOPMODE_CYCLE
);
考虑以下与BabylonJS&minus的动画相关的参数;
动画的名称.
形状的属性 - 例如,缩放,改变位置等.缩放是语法中显示的内容;在这里,它将沿着x轴缩放框.
请求的每秒帧数:此动画中可能的最高FPS.
在此决定并输入将被修改的值:它是浮点数(例如转换),向量(例如方向)还是四元数.
确切的值是 :
BABYLON .Animation.ANIMATIONTYPE_FLOAT
BABYLON.Animation.ANIMATIONTYPE_VECTOR2
BABYLON.Animation.ANIMATIONTYPE_VECTOR3
BABYLON.Animation.ANIMATIONTYPE_QUATERNION
BABYLON.Animation.ANIMATIONTYPE_COLOR3
动画行为 - 停止或再次开始动画.
使用以前的值并递增和减去;
BABYLON.Animation.ANIMATIONLOOPMODE_RELATIVE
从初始值&minus重启;
BABYLON.Animation.ANIMATIONLOOPMODE_CYCLE
保持最终价值
BABYLON.Animation.ANIMATIONLOOPMODE_CONSTANT
现在让我们创建动画对象 :
var animationBox = new BABYLON.Animation(
   "myAnimation",
   "scaling.x",
   30,
   BABYLON.Animation.ANIMATIONTYPE_FLOAT,
   BABYLON.Animation.ANIMATIONLOOPMODE_CYCLE
);
<!doctype html>
<html>
   <head>
      <meta charset = "utf-8">
      <title>BabylonJs - Basic Element-Creating Scene</title>
      <script src = "babylon.js"></script>
      <style>
         canvas {width: 100%; height: 100%;}
      </style>
   </head>

   <body>
      <canvas id = "renderCanvas"></canvas>
      <script type = "text/javascript">
         var canvas = document.getElementById("renderCanvas");
         var engine = new BABYLON.Engine(canvas, true);

         var createScene  = function() {
            var scene = new BABYLON.Scene(engine);
            scene.clearColor = new BABYLON.Color3(0, 1, 0);

            var camera = new BABYLON.ArcRotateCamera("Camera", 1, 0.8, 10, new BABYLON.Vector3(0, 0, 0), scene);
            camera.attachControl(canvas, true);

            var light = new BABYLON.HemisphericLight("light1", new BABYLON.Vector3(0, 1, 0), scene);
            light.intensity = 0.7;

            var pl = new BABYLON.PointLight("pl", BABYLON.Vector3.Zero(), scene);
            pl.diffuse = new BABYLON.Color3(1, 1, 1);
            pl.specular = new BABYLON.Color3(1, 1, 1);
            pl.intensity = 0.8;

            var box = BABYLON.Mesh.CreateBox("box", '3', scene);
            box.position = new BABYLON.Vector3(-10,0,0);

            var box1 = BABYLON.Mesh.CreateBox("box1", '3', scene);
            box1.position = new BABYLON.Vector3(0,0,0);

            var animationBox = new BABYLON.Animation("myAnimation", "scaling.x", 30, BABYLON.Animation.ANIMATIONTYPE_FLOAT, BABYLON.Animation.ANIMATIONLOOPMODE_CYCLE);

            var animationBox1 = new BABYLON.Animation("myAnimation1", "scaling.z", 10, BABYLON.Animation.ANIMATIONTYPE_FLOAT, BABYLON.Animation.ANIMATIONLOOPMODE_CYCLE);

            // An array with all animation keys
            var keys = [];

            //At the animation key 0, the value of scaling is "1"
            keys.push({
               frame: 0,
               value: 1
            });

            //At the animation key 20, the value of scaling is "0.2"
            keys.push({
               frame: 20,
               value: 0.2
            });

            keys.push({
               frame: 60,
               value: 0.4
            });

            //At the animation key 100, the value of scaling is "1"
            keys.push({
               frame: 100,
               value: 1
            });

            animationBox.setKeys(keys);
            box.animations = [];
            box.animations.push(animationBox);
            scene.beginAnimation(box, 0, 100, true);

            // An array with all animation keys
            var keys = [];

            //At the animation key 0, the value of scaling is "1"
            keys.push({
               frame: 0,
               value: 1
            });

            //At the animation key 20, the value of scaling is "0.2"
            keys.push({
               frame: 60,
               value: 0.2
            });

            //At the animation key 100, the value of scaling is "1"
            keys.push({
               frame: 100,
               value: 1
            });
            animationBox1.setKeys(keys);
            box1.animations = [];
            box1.animations.push(animationBox1);
            scene.beginAnimation(box1, 0, 100, true);
            return scene;
         };
         var scene = createScene();
         engine.runRenderLoop(function() {
            scene.render();
         });
      </script>
   </body>
</html>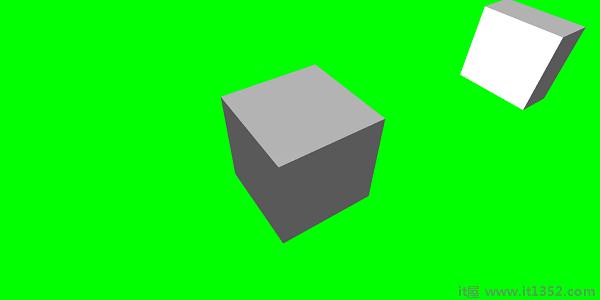
// An array with all animation keys
var keys = [];

//At the animation key 0, the value of scaling is "1"
keys.push({
   frame: 0,
   value: 1
});

//At the animation key 20, the value of scaling is "0.2"
keys.push({
   frame: 20,
   value: 0.2
});

//At the animation key 100, the value of scaling is "1"
keys.push({
   frame: 100,
   value: 1
});

animationBox.setKeys(keys);

box.animations = [];

box.animations.push(animationBox);

scene.beginAnimation(box, 0, 100, true); //defines the start and the end on the target shape box.
以下是动画对象上可用的其他函数 :
pause()
restart()
stop()
reset()
我们可以在变量中存储 beginAnimation 引用,并使用引用来停止,暂停或重置动画.
var newAnimation = scene.beginAnimation(box1,0,100,true);
例如,
newAnimation.pause();
动画对象上有可用于控制关键帧的函数.
BABYLON.Animation.prototype.floatInterpolateFunction = function (startValue, endValue, gradient) {
   return startValue + (endValue - startValue) * gradient;
};

BABYLON.Animation.prototype.quaternionInterpolateFunction = function (startValue, endValue, gradient) {
   return BABYLON.Quaternion.Slerp(startValue, endValue, gradient);
};

BABYLON.Animation.prototype.vector3InterpolateFunction = function (startValue, endValue, gradient) {
   return BABYLON.Vector3.Lerp(startValue, endValue, gradient);
};
以下是您可以更改和减去的功能列表;
floatInterpolateFunction
quaternionInterpolateFunction
quaternionInterpolateFunctionWithTangents
vector3InterpolateFunction
vector3InterpolateFunctionWithTangents
vector2InterpolateFunction
vector2InterpolateFunctionWithTangents
sizeInterpolateFunction
color3InterpolateFunction
matrixInterpolateFunction
要创建快速动画,有一个可以直接使用的功能.
例如,
Animation.CreateAndStartAnimation = function(name,mesh,tartgetProperty,framePerSecond,totalFrame,from ,to,loopMode);
这里你只能使用2个关键帧 - 开始和结束.
<!doctype html>
<html>
   <head>
      <meta charset = "utf-8">
      <title>BabylonJs - Basic Element-Creating Scene</title>
      <script src = "babylon.js"></script>
      <style>
         canvas {width: 100%; height: 100%;}
      </style>
   </head>

   <body>
      <canvas id = "renderCanvas"></canvas>
      <script type = "text/javascript">
         var canvas = document.getElementById("renderCanvas");
         var engine = new BABYLON.Engine(canvas, true);

         var createScene  = function() {
            var scene = new BABYLON.Scene(engine);
            scene.clearColor = new BABYLON.Color3(0, 1, 0);

            var camera = new BABYLON.ArcRotateCamera("Camera", 1, 0.8, 10, new BABYLON.Vector3(0, 0, 0), scene);
            camera.attachControl(canvas, true);

            var light = new BABYLON.HemisphericLight("light1", new BABYLON.Vector3(0, 1, 0), scene);
            light.intensity = 0.7;

            var pl = new BABYLON.PointLight("pl", BABYLON.Vector3.Zero(), scene);
            pl.diffuse = new BABYLON.Color3(1, 1, 1);
            pl.specular = new BABYLON.Color3(1, 1, 1);
            pl.intensity = 0.8;

            var box = BABYLON.Mesh.CreateBox("box", '3', scene);
            box.position = new BABYLON.Vector3(0,0,0);
            BABYLON.Animation.CreateAndStartAnimation('boxscale', box, 'scaling.x', 30, 120, 1.0, 1.5);
            return scene;
         };
         var scene = createScene();
         engine.runRenderLoop(function() {
            scene.render();
         });
      </script>
   </body>
</html>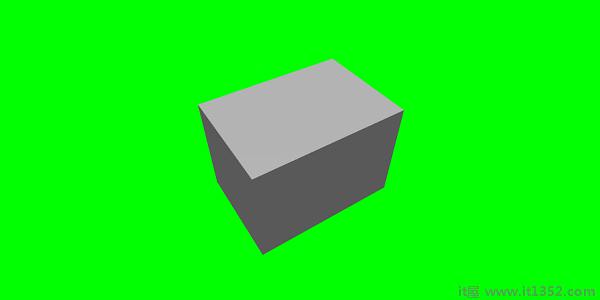
你可以在enableBlending = true的帮助下实现动画混合;
这个混合动画将从当前对象状态改变.
为了使动画更令人印象深刻,我们已经使用了一些缓动函数css更早.
以下是缓和函数列表 :
BABYLON .CircleEase()
BABYLON.BackEase(幅度)
BABYLON.BounceEase( bounce,bounciness)
BABYLON.CubicEase()
BABYLON.ElasticEase(振荡) ,弹性)
BABYLON.ExponentialEase(exponent)
BABYLON.PowerEase(power )
BABYLON.QuadraticEase()
BABYLON.QuarticEase()
BABYLON.QuinticEase()
BABYLON.SineEase()
<!doctype html>
<html>
   <head>
      <meta charset = "utf-8">
      <title>BabylonJs - Basic Element-Creating Scene</title>
      <script src = "babylon.js"></script>
      <style>
         canvas {width: 100%; height: 100%;}
      </style>
   </head>

   <body>
      <canvas id = "renderCanvas"></canvas>
      <script type = "text/javascript">
         var canvas = document.getElementById("renderCanvas");
         var engine = new BABYLON.Engine(canvas, true);
         var createScene  = function() {
            var scene = new BABYLON.Scene(engine);
            scene.clearColor = new BABYLON.Color3(0, 1, 0);

            var camera = new BABYLON.ArcRotateCamera("Camera", 1, 0.8, 10, new BABYLON.Vector3(0, 0, 0), scene);
            camera.attachControl(canvas, true);

            var light = new BABYLON.HemisphericLight("light1", new BABYLON.Vector3(0, 1, 0), scene);
            light.intensity = 0.7;

            var pl = new BABYLON.PointLight("pl", BABYLON.Vector3.Zero(), scene);
            pl.diffuse = new BABYLON.Color3(1, 1, 1);
            pl.specular = new BABYLON.Color3(1, 1, 1);
            pl.intensity = 0.8;

            var box1 = BABYLON.Mesh.CreateTorus("torus", 5, 1, 10, scene, false);
            box1.position = new BABYLON.Vector3(0,0,0);

            var animationBox1 = new BABYLON.Animation("myAnimation1", "scaling.z", 10, BABYLON.Animation.ANIMATIONTYPE_FLOAT, BABYLON.Animation.ANIMATIONLOOPMODE_CYCLE);

            // An array with all animation keys
            var keys = [];

            //At the animation key 0, the value of scaling is "1"
            keys.push({
               frame: 0,
               value: 1
            });

            //At the animation key 20, the value of scaling is "0.2"
            keys.push({
               frame: 60,
               value: 0.2
            });

            //At the animation key 100, the value of scaling is "1"
            keys.push({
               frame: 100,
               value: 1
            });

            animationBox1.setKeys(keys);
            box1.animations = [];
            // box1.animations.push(animationBox1);

            var easingFunction = new BABYLON.QuarticEase();
            easingFunction.setEasingMode(BABYLON.EasingFunction.EASINGMODE_EASEINOUT);

            animationBox1.setEasingFunction(easingFunction);
            box1.animations.push(animationBox1);
            scene.beginAnimation(box1, 0, 100, true);
            return scene;
         };
         var scene = createScene();
         engine.runRenderLoop(function() {
            scene.render();
         });
      </script>
   </body>
</html>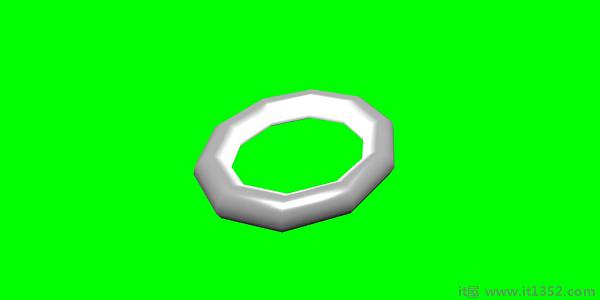
您可以在动画事件中执行任何必要的操作.如果要在更改帧或动画完成时更改任何内容,可以通过向动画添加事件来实现.
var event1 = new BABYLON.AnimationEvent(50, function() { console.log("Yeah!"); }, true);
// You will get hte console.log when the frame is changed to 50 using animation.

animation.addEvent(event1); //attaching event to the animation.精灵在计算机图形学中指的是什么?它基本上是一个集成到更大场景中的二维位图.当多个较小的图像组合成单个位图以节省内存时,生成的图像称为精灵表.让我们开始使用sprite以及如何使用它们.
开始使用sprite的第一步是创建一个精灵管理器.
var spriteManagerTrees = new BABYLON.SpriteManager("treesManagr", "Assets/Palm-arecaceae.png", 2000, 800, scene);考虑以下参数来创建精灵管理器 :
姓名 : 这位经理的姓名.
网址 : 要使用的图片网址.
经理的能力 : 此管理器中的最大实例数.例如,上述insteance将创建2000棵树.
单元格大小 : 图像所占的大小.
场景 : 将添加经理的场景.
var spriteManagerPlayer = new BABYLON.SpriteManager("playerManagr","Assets/Player.png", 2, 64, scene);看一下上面的对象.我们给了一个玩家形象,现在正在创建它的2个实例.图像的大小是64.精灵的每个图像必须包含在64像素的正方形中,不能再少.
现在让我们创建链接到精灵管理器的实例.
var player = new BABYLON.Sprite("player",spriteManagerPlayer);你可以像任何其他形状或网格一样玩这个玩家对象.您可以指定位置,大小,角度等.
 player.size = 0.3;
 player.angle = Math.PI/4;
 player.invertU = -1;
 player.width = 0.3;
 player.height = 0.4;
<!doctype html>
<html>
   <head>
      <meta charset = "utf-8">
      <title>BabylonJs - Basic Element-Creating Scene</title>
      <script src = "babylon.js"></script>
      <style>
         canvas {width: 100%; height: 100%;}
      </style>
   </head>

   <body>
      <canvas id = "renderCanvas"></canvas>
      <script type = "text/javascript">
         var canvas = document.getElementById("renderCanvas");
         var engine = new BABYLON.Engine(canvas, true);
         var createScene  = function() {
            var scene = new BABYLON.Scene(engine);
            //scene.clearColor = new BABYLON.Color3(0, 1, 0);
            // Create camera and light
            var light = new BABYLON.PointLight("Point", new BABYLON.Vector3(5, 10, 5), scene);

            var camera = new BABYLON.ArcRotateCamera("Camera", 1, 0.8, 8, new BABYLON.Vector3(0, 0, 0), scene);
            camera.attachControl(canvas, true);

            var spriteManagerTrees = new BABYLON.SpriteManager("trees", "images/tree.png", 1000, 400, scene);

            for (var i = 0; i < 1000; i++) {
               var tree = new BABYLON.Sprite("tree", spriteManagerTrees);
               tree.position.x = Math.random() * 100 - 50;
               tree.position.z = Math.random() * 100 - 50;
               tree.isPickable = true;

               //Some "dead" trees
               if (Math.round(Math.random() * 5) === 0) {
                  tree.angle = Math.PI * 90 / 180;
                  tree.position.y = -0.3;
               }
            }

            var spriteManagerTrees1 = new BABYLON.SpriteManager("trees1", "images/tree1.png", 1000,400, scene);

            for (var i = 0; i < 1000; i++) {
               var tree1 = new BABYLON.Sprite("tree1", spriteManagerTrees1);
               if (i %2 == 0) {
               tree1.position.x = Math.random() * 100 - 50;
               } else {
                  tree1.position.z = Math.random() * 100 - 50;
               }
               tree1.isPickable = true;
            }

            spriteManagerTrees.isPickable = true;
            spriteManagerTrees1.isPickable = true;

            var spriteManagerPlayer = new BABYLON.SpriteManager("playerManager", "images/bird.png", 2, 200, scene);

            var player = new BABYLON.Sprite("player", spriteManagerPlayer);
            player.position.x = 2;
            player.position.y = 2;
            player.position.z = 0;


            var spriteManagerPlayer1 = new BABYLON.SpriteManager("playerManager1", "images/bird.png", 2, 200, scene);

            var player1 = new BABYLON.Sprite("player", spriteManagerPlayer1);
            player1.position.x = 1;
            player1.position.y = 2;
            player1.position.z = 0;

            var spriteManagerPlayer2 = new BABYLON.SpriteManager("playerManager2", "images/bird.png", 2, 200, scene);

            var player2 = new BABYLON.Sprite("player", spriteManagerPlayer2);
            player2.position.x = 0;
            player2.position.y = 1;
            player2.position.z = 0;

            scene.onPointerDown = function (evt) {
               var pickResult = scene.pickSprite(this.pointerX, this.pointerY);
               if (pickResult.hit) {
                  pickResult.pickedSprite.angle += 1;
               }
            };
            return scene;
         };
         var scene = createScene();
         engine.runRenderLoop(function() {
            scene.render();
         });
      </script>
   </body>
</html>![]()
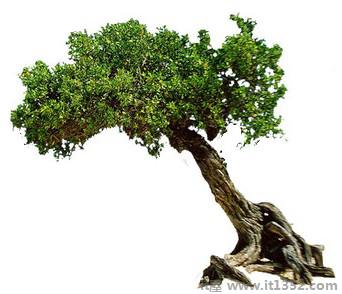
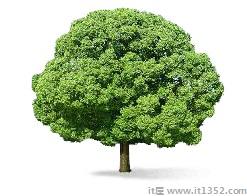
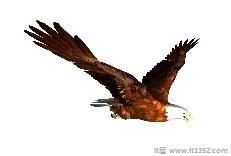
在这个演示中,我们使用了一个名为tree.png,tree1.png的图像来显示树,bird.png来显示场景中的鸟.这些图像存储在本地的图像/文件夹中,也粘贴在下面以供参考.您可以下载您选择的任何图像并在演示链接中使用.
用于树的图像如下所示.
图像/tree.png
images/tree1.png
images/bird.png
现在让我们再看一个带有精灵气球的演示.
<!doctype html>
<html>
   <head>
      <meta charset = "utf-8">
      <title>BabylonJs - Basic Element-Creating Scene</title>
      <script src = "babylon.js"></script>
      <style>
         canvas {width: 100%; height:100%;}
      </style>
   </head>

   <body>
      <canvas id = "renderCanvas"></canvas>
      <script type = "text/javascript">
         var canvas = document.getElementById("renderCanvas");
         var engine = new BABYLON.Engine(canvas, true);

         var createScene  = function() {
            var scene = new BABYLON.Scene(engine);

            var light = new BABYLON.PointLight("Point", new BABYLON.Vector3(5, 10, 5), scene);

            var camera = new BABYLON.ArcRotateCamera("Camera", -3.4, 1.0, 82, new BABYLON.Vector3(0, -15, 0), scene);
            camera.setPosition(new BABYLON.Vector3(30, 0,100));
            camera.attachControl(canvas, true);

            var spriteManagerTrees = new BABYLON.SpriteManager("trees", "images/balloon.png", 50, 450, scene);

            var treearray = [];
            for (var i = 0; i < 50; i++) {
               var tree = new BABYLON.Sprite("tree", spriteManagerTrees);
               tree.position.x = Math.random() * 100 - 10;
               tree.position.z = Math.random() * 100 - 10;
               tree.position.y = -35;
               tree.isPickable = true;
               treearray.push(tree);
            }

            spriteManagerTrees.isPickable = true;
            scene.onPointerDown = function (evt) {
               var pickResult = scene.pickSprite(this.pointerX, this.pointerY);
               if (pickResult.hit) {
                  pickResult.pickedSprite.position.y = -3000;
               }
            };

            k = -35;
            var animate = function() {
               if (k > 3) return;
               k += 0.05;
               for (var i = 0; i < treearray.length; i++) {
                  treearray[i].position.y = k;
               }
            };
            scene.registerBeforeRender(animate);
            return scene;
         };
         var scene = createScene();
         engine.runRenderLoop(function() {
            scene.render();
         });
      </script>
   </body>
</html>![]()
在这个演示中,我们使用了名为ballon.png的图像.图像存储在本地的图像/文件夹中,也粘贴在下面以供参考.您可以下载任何您选择的图像并在演示链接中使用.
images/balloon.png
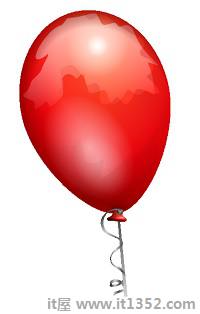
气球会在天空中升起,一旦停止,你可以点击它们,它们就会消失.这是使用pickSprite函数完成的,该函数在单击创建的精灵时提供详细信息.
当鼠标操作发生并且精灵的位置发生变化时,将调用onPointerDown函数.
var animate = function() {
   if (k > 3) return;
   k += 0.05;
   for (var i = 0; i < treearray.length; i++) {
      treearray[i].position.y = k;
   }
};
scene.registerBeforeRender(animate);
在registerBeforeRender中调用animate函数,它负责将气球从初始-35移动到+3.通过递增0.05来缓慢移动.
粒子系统是计算机图形学中的一种技术,它利用了大量非常小的精灵,3D模型或其他图形对象来模拟某些类型的"模糊"现象,否则这些现象很难用传统渲染技术重现.
创建粒子系统,您必须按以下方式调用该类;
var particleSystem = new BABYLON.ParticleSystem("particles",2000,scene);//2000指的是要生产的粒子总数.粒子系统需要考虑以下属性 :
 particleSystem.particleTexture = new BABYLON.Texture("Flare.png",scene);
 particleSystem.textureMask = new BABYLON.Color4(0.1,0.8,0.8,1.0);
 particleSystem.emitter = fountain
 particleSystem.color1 = new BABYLON.Color4(0.7,0.8,1.0,1.0);
 particleSystem.color2 = new BABYLON.Color4(0.2,0.5,1.0,1.0);
 particleSystem.colorDead = new BABYLON.Color4(0,0,0.2,0.0);
emitter属性采用必须从中发射粒子的网格. color1 和 color2 是粒子的颜色.
ColorDead 是应用于粒子就在它从场景中消失之前因此被称为colorDead.
 particleSystem.minSize = 0.1;
 particleSystem.maxSize = 0.5;
 particleSystem.minLifeTime = 0.3;
 particleSystem.maxLifeTime = 1.5;
MinSize和maxSize是给予粒子的大小. MinlifeTime和maxLifeTime是赋予粒子的生命周期.
particleSystem.emitRate = 1500;
emitRate是粒子发射的速率.
我们在下面的演示中使用过torus .我们使用粒子系统及其属性来获取环面周围的所有粒子.
<!doctype html>
<html>
   <head>
      <meta charset = "utf-8">
      <title>BabylonJs - Basic Element-Creating Scene</title>
      <script src = "babylon.js"></script>
      <style>
         canvas {width: 100%; height: 100%;}
      </style>
   </head>

   <body>
      <canvas id = "renderCanvas"></canvas>
      <script type = "text/javascript">
         var canvas = document.getElementById("renderCanvas");
         var engine = new BABYLON.Engine(canvas, true);
         var createScene  = function() {
            var scene = new BABYLON.Scene(engine);
            // Setup environment

            var light0 = new BABYLON.PointLight("Omni", new BABYLON.Vector3(0, 2, 8), scene);

            var camera = new BABYLON.ArcRotateCamera("ArcRotateCamera", 1, 0.8, 20, new BABYLON.Vector3(0, 0, 0), scene);
            camera.attachControl(canvas, true);

            var fountain = BABYLON.Mesh.CreateTorus("torus", 2, 1, 8, scene, false);

            var particleSystem = new BABYLON.ParticleSystem("particles", 2000, scene);
            particleSystem.particleTexture = new BABYLON.Texture("images/dot.jpg", scene);

            particleSystem.textureMask = new BABYLON.Color4(0.1, 0.8, 0.8, 1.0);
            particleSystem.emitter = fountain;


            particleSystem.minEmitBox = new BABYLON.Vector3(-1, 0, 0); // Starting all from
            particleSystem.maxEmitBox = new BABYLON.Vector3(1, 0, 0); // To...

            particleSystem.color1 = new BABYLON.Color4(0.7, 0.8, 1.0, 1.0);
            particleSystem.color2 = new BABYLON.Color4(0.2, 0.5, 1.0, 1.0);
            particleSystem.colorDead = new BABYLON.Color4(0, 0, 0.2, 0.0);

            particleSystem.minSize = 0.1;
            particleSystem.maxSize = 0.5;

            particleSystem.minLifeTime = 0.3;
            particleSystem.maxLifeTime = 1.5;

            particleSystem.emitRate = 1500;

            particleSystem.blendMode = BABYLON.ParticleSystem.BLENDMODE_ONEONE;

            particleSystem.gravity = new BABYLON.Vector3(0, -9.81, 0);

            particleSystem.direction1 = new BABYLON.Vector3(-7, 8, 3);
            particleSystem.direction2 = new BABYLON.Vector3(7, 8, -3);


            particleSystem.minAngularSpeed = 0;
            particleSystem.maxAngularSpeed = Math.PI;

            particleSystem.minEmitPower = 1;
            particleSystem.maxEmitPower = 3;
            particleSystem.updateSpeed = 0.005;

            particleSystem.start();
            var keys = [];
            var animation = new BABYLON.Animation("animation", "rotation.x", 30, BABYLON.Animation.ANIMATIONTYPE_FLOAT,
                                   BABYLON.Animation.ANIMATIONLOOPMODE_CYCLE);

            // At the animation key 0, the value of scaling is "1"
            keys.push({
               frame: 0,
               value: 0
            });

            // At the animation key 50, the value of scaling is "0.2"
            keys.push({
               frame: 50,
               value: Math.PI
            });

            // At the animation key 100, the value of scaling is "1"
            keys.push({
               frame: 100,
               value: 0
            });

            // Launch animation
            animation.setKeys(keys);
            fountain.animations.push(animation);
            scene.beginAnimation(fountain, 0, 100, true);
            return scene;
         }
         var scene = createScene();
         engine.runRenderLoop(function() {
            scene.render();
         });
      </script>
   </body>
</html> 上面的代码行生成以下输出 :
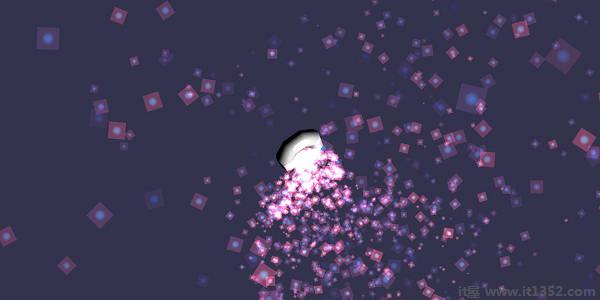
在本演示中,我们使用了名为dot.jpg的图像.图像存储在本地的图像/文件夹中,也粘贴在下面以供参考.您可以下载您选择的任何图像并在演示链接中使用.
以下是粒子纹理的图像: images/dot.jpg

<!doctype html>
<html>
   <head>
      <meta charset = "utf-8">
      <title>BabylonJs - Ball/Ground Demo</title>
      <script src = "babylon.js"></script>
      <style>
         canvas {width: 100%; height: 100%;}
      </style>
   </head>

   <body>
      <canvas id = "renderCanvas"></canvas>
      <script type = "text/javascript">
         var canvas = document.getElementById("renderCanvas");
         var engine = new BABYLON.Engine(canvas, true);

         var createScene  = function() {
            var scene = new BABYLON.Scene(engine);
            scene.clearColor = new BABYLON.Color3( .5, .5, .5);

            var camera = new BABYLON.ArcRotateCamera("camera1",  0, 0, 0, new BABYLON.Vector3(0, 0, -0), scene);
            camera.setPosition(new BABYLON.Vector3(-100, 0,-100));
            camera.attachControl(canvas, true);

            var light = new BABYLON.HemisphericLight("light1", new BABYLON.Vector3(1, 0.5, 0), scene);
            var pl = new BABYLON.PointLight("pl", new BABYLON.Vector3(0, 0, 0), scene);

            var gmat = new BABYLON.StandardMaterial("mat1", scene);
            gmat.alpha = 1.0;

            var ground =  BABYLON.Mesh.CreateGround("ground", 100, 100, 20, scene);
            ground.material = gmat;
            gmat.wireframe = true;

            var particleSystem = new BABYLON.ParticleSystem("particles", 2000, scene);
            particleSystem.particleTexture = new BABYLON.Texture("images/dot.jpg", scene);

            particleSystem.textureMask = new BABYLON.Color4(0.1, 0.8, 0.8, 1.0);
            particleSystem.emitter = ground;

            particleSystem.minEmitBox = new BABYLON.Vector3(-1, 0, 0); // Starting all from
            particleSystem.maxEmitBox = new BABYLON.Vector3(1, 0, 0); // To...

            particleSystem.color1 = new BABYLON.Color4(0.7, 0.8, 1.0, 1.0);
            particleSystem.color2 = new BABYLON.Color4(0.2, 0.5, 1.0, 1.0);
            particleSystem.colorDead = new BABYLON.Color4(0, 0, 0.2, 0.0);

            particleSystem.minSize = 0.1;
            particleSystem.maxSize = 0.5;

            particleSystem.minLifeTime = 0.3;
            particleSystem.maxLifeTime = 1.5;

            particleSystem.emitRate = 1500;

            particleSystem.blendMode = BABYLON.ParticleSystem.BLENDMODE_ONEONE;

            particleSystem.gravity = new BABYLON.Vector3(0, -9.81, 0);

            particleSystem.direction1 = new BABYLON.Vector3(-7, 8, 3);
            particleSystem.direction2 = new BABYLON.Vector3(7, 8, -3);

            particleSystem.minAngularSpeed = 0;
            particleSystem.maxAngularSpeed = Math.PI;

            particleSystem.minEmitPower = 1;
            particleSystem.maxEmitPower = 3;
            particleSystem.updateSpeed = 0.005;

            particleSystem.start();


            var keys = [];
            var animation = new BABYLON.Animation("animation", "rotation.x", 30, BABYLON.Animation.ANIMATIONTYPE_FLOAT,
                           BABYLON.Animation.ANIMATIONLOOPMODE_CYCLE);

            // At the animation key 0, the value of scaling is "1"
            keys.push({
               frame: 0,
               value: 0
            });

            // At the animation key 50, the value of scaling is "0.2"
            keys.push({
               frame: 50,
               value: Math.PI
            });

            // At the animation key 100, the value of scaling is "1"
            keys.push({
               frame: 100,
               value: 0
            });

            // Launch animation
            animation.setKeys(keys);
            ground.animations.push(animation);

            //scene.beginAnimation(ground, 0, 100, true);
            return scene;
         };
         var scene = createScene();
         engine.runRenderLoop(function() {
            scene.render();
         });
      </script>
   </body>
</html>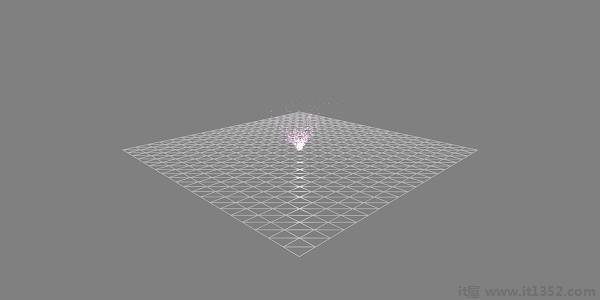
<!doctype html>
<html>
   <head>
      <meta charset = "utf-8">
      <title>BabylonJs - Ball/Ground Demo</title>
      <script src = "babylon.js"></script>
      <style>
         canvas {width: 100%; height: 100%;}
      </style>
   </head>

   <body>
      <canvas id = "renderCanvas"></canvas>
      <script type = "text/javascript">
         var canvas = document.getElementById("renderCanvas");
         var engine = new BABYLON.Engine(canvas, true);

         var createScene  = function() {
            var scene = new BABYLON.Scene(engine);
            scene.clearColor = new BABYLON.Color3( .5, .5, .5);

            var camera = new BABYLON.ArcRotateCamera("camera1",  0, 0, 0, new BABYLON.Vector3(0, 0, -0), scene);
            camera.setPosition(new BABYLON.Vector3(-100, 0, -100));
            camera.attachControl(canvas, true);

            var light = new BABYLON.HemisphericLight("light1", new BABYLON.Vector3(1, 0.5, 0), scene);
            var pl = new BABYLON.PointLight("pl", new BABYLON.Vector3(0, 0, 0), scene);

            var gmat = new BABYLON.StandardMaterial("mat1", scene);
            gmat.alpha = 1.0;

            var ground =  BABYLON.Mesh.CreateGround("ground", 100, 100, 20, scene);
            ground.material = gmat;
            gmat.wireframe = true;

            var particleSystem = new BABYLON.ParticleSystem("particles", 2000, scene);
            particleSystem.particleTexture = new BABYLON.Texture("images/dot.jpg", scene);

            particleSystem.textureMask = new BABYLON.Color4(0.1, 0.8, 0.8, 1.0);
            particleSystem.emitter = ground;

            particleSystem.minEmitBox = new BABYLON.Vector3(-1, 0, 0); // Starting all from
            particleSystem.maxEmitBox = new BABYLON.Vector3(1, 0, 0); // To...

            particleSystem.color1 = new BABYLON.Color4(0.7, 0.8, 1.0, 1.0);
            particleSystem.color2 = new BABYLON.Color4(0.2, 0.5, 1.0, 1.0);
            particleSystem.colorDead = new BABYLON.Color4(0, 0, 0.2, 0.0);

            particleSystem.minSize = 0.1;
            particleSystem.maxSize = 0.5;

            particleSystem.minLifeTime = 0.3;
            particleSystem.maxLifeTime = 1.5;

            particleSystem.emitRate = 1500;

            particleSystem.blendMode = BABYLON.ParticleSystem.BLENDMODE_ONEONE;

            particleSystem.gravity = new BABYLON.Vector3(0, -9.81, 0);//gravity for the particle.

            particleSystem.direction1 = new BABYLON.Vector3(-7, 8, 3);
            particleSystem.direction2 = new BABYLON.Vector3(7, 8, -3);

            //random direction for the particles on the scene
            particleSystem.minAngularSpeed = 0;
            particleSystem.maxAngularSpeed = Math.PI;
            particleSystem.minEmitPower = 1;
            particleSystem.maxEmitPower = 3;
            particleSystem.updateSpeed = 0.005;

            particleSystem.start();

            var keys = [];
            var animation = new BABYLON.Animation("animation", "rotation.x", 30, BABYLON.Animation.ANIMATIONTYPE_FLOAT,
                           BABYLON.Animation.ANIMATIONLOOPMODE_CYCLE);

            // At the animation key 0, the value of scaling is "1"
            keys.push({
               frame: 0,
               value: 0
            });

            // At the animation key 50, the value of scaling is "0.2"
            keys.push({
               frame: 50,
               value: Math.PI
            });

            // At the animation key 100, the value of scaling is "1"
            keys.push({
               frame: 100,
               value: 0
            });

            // Launch animation
            animation.setKeys(keys);
            ground.animations.push(animation);
            scene.beginAnimation(ground, 0, 100, true);
            return scene;
         };
         var scene = createScene();
         engine.runRenderLoop(function() {
            scene.render();
         });
      </script>
   </body>
</html>The above line of code generates the following output :

The above demo shows a ground with wireframe material and the particle system is produced from the center.