Babylon.js是一个流行的框架,可以帮助开发人员构建3D游戏.它具有实现3D功能的内置功能.让我们使用Babylon.js构建一个简单的演示,并了解入门所需的基本功能.
我们将首先创建一个包含Babylon.js基本元素的演示.此外,我们还将学习Babylon.js的各种功能.
在本节中,我们将学习如何创建一个包含BabylonJS基本元素的演示.
<!doctype html>
<html>
   <head>
      <meta charset = "utf-8">
      <title> Babylon.JS : Demo2</title>
      <script src = "babylon.js"></script>
      <style>
         canvas { width: 100%; height: 100%;}
      </style>
   </head>

   <body>
      <canvas id = "renderCanvas"></canvas>
      <script type = "text/javascript">
         var canvas = document.getElementById("renderCanvas");
         var engine = new BABYLON.Engine(canvas, true);
         var createScene  = function() {
            var scene = new BABYLON.Scene(engine);
            scene.clearColor = new BABYLON.Color3(1, 0.8, 0.8);

            var camera = new BABYLON.ArcRotateCamera("Camera", 1, 0.8, 10, new BABYLON.Vector3(0, 0, 0), scene);
            scene.activeCamera.attachControl(canvas);

            var light0 = new BABYLON.PointLight("Omni", new BABYLON.Vector3(0, 0, 10), scene);

            var origin = BABYLON.Mesh.CreateSphere("origin", 10, 1.0, scene);

            var torus = BABYLON.Mesh.CreateTorus("torus", 5, 1, 10, scene, false);

            var box = BABYLON.Mesh.CreateBox("box", 3.0, scene);
            box.position = new BABYLON.Vector3(-5, 0, 0);

            var cylinder = BABYLON.Mesh.CreateCylinder("cylinder", 3, 3, 3, 6, 1, scene, false);

            cylinder.position = new BABYLON.Vector3(5, 0, 0);
            return scene;
         };
         var scene = createScene();
         engine.runRenderLoop(function() {
            scene.render();
         });
      </script>
   </body>
</html>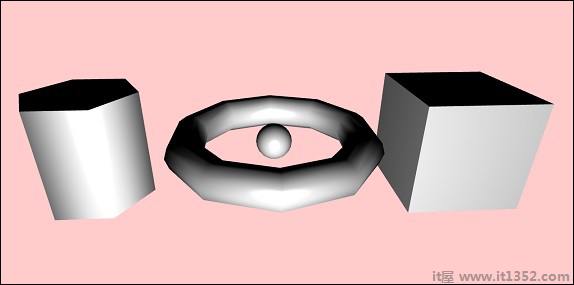
运行BabylonJS,我们需要支持WEBGL的现代浏览器.最新的浏览器--Internet Explorer 11 +,Firefox 4 +,Google Chrome 9 +,Opera 15+等都支持WEBGL,演示可以在同一平台上执行以查看输出.创建一个目录来存储babylonjs的文件.从BabylonJS站点获取最新的BabylonJSscripts文件.本教程中的所有演示链接都使用babylonjs版本3.3进行测试.
创建一个简单的html页面并包含Babylon.js文件.
创建一个canvas标签,用于通过BabylonJSinside将body标签呈现为如下所示.
将css添加到画布以占据屏幕的整个宽度和高度.
<!doctype html>
<html>
   <head>
      <meta charset = "utf-8">
      <title>MDN Games: Babylon.js demo - shapes</title>
      <script src = "babylon.js"></script>

      <style>
         canvas {width: 100%; height: 100%;}
      </style>
   </head>
   <body>
      <canvas id = "renderCanvas"></canvas>
   </body>
</html>现在让我们从BabylonJScode开始,在画布上呈现内容.
<!doctype html>
<html>
   <head>
      <meta charset = "utf-8">
      <title>MDN Games: Babylon.js demo - shapes</title>
      <script src = "babylon.js"></script>
      <style>
         canvas {width: 100%; height: 100%;}
      </style>
   </head>
   <body>
      <canvas id = "renderCanvas"></canvas>
      <script type = "text/javascript">
         var canvas = document.getElementById("renderCanvas");
         var engine = new BABYLON.Engine(canvas, true);
      </script>
   </body>
</html>
现在,将脚本标记添加到html结构并将画布引用存储在变量画布中.
要获取从Babylon.js开始,创建一个引擎实例并将画布引用传递给它.
<script type = "text/javascript">
   var canvas = document.getElementById("renderCanvas");
   var engine = new BABYLON.Engine(canvas, true);
</script>
BABYLON全局对象包含引擎中可用的所有Babylon.js函数.
在这一步中,我们将首先创建一个场景.
场景是显示所有内容的场景.我们将创建不同类型的对象并将其添加到场景中以使其在屏幕上可见.要创建场景,请将以下代码添加到已创建的html结构中.目前,我们将附加已经创建的代码作为上述html结构的延续.
var createScene  = function() {
   var scene = new BABYLON.Scene(engine);
   scene.clearColor = new BABYLON.Color3(1, 0.8, 0.8);
};
var scene = createScene();
最终的html文件如下所示 :
<!doctype html>
<html>
   <head>
      <meta charset = "utf-8">
      <title>MDN Games: Babylon.js demo - shapes</title>
      <script src = "babylon.js"></script>
      <style>
         canvas {width: 100%; height: 100%;}
      </style>
   </head>

   <body>
      <canvas id = "renderCanvas"></canvas>
      <script type = "text/javascript">
         var canvas = document.getElementById("renderCanvas");
         var engine = new BABYLON.Engine(canvas, true);

         var createScene  = function() {
            var scene = new BABYLON.Scene(engine);
            scene.clearColor = new BABYLON.Color3(0, 1, 0);
            return scene;
         };
         var scene = createScene();
      </script>
   </body>
</html>
在上面的例子中,定义了CreateScene函数,var scene = createScene()正在调用函数.
CreateScene函数在其中创建了场景,下一行为场景添加了颜色,使用BABYLON.Color3(1,0.8,0.8)完成,此处的颜色为粉红色.
var scene = new BABYLON.Scene(engine);
scene.clearColor = new BABYLON.Color3(1, 0.8, 0.8);
在浏览器中执行上述演示链接现在不会在浏览器屏幕上显示任何内容.还有一个步骤要添加到代码中,在步骤4中称为engine.runRenderLoop.
要使场景实际上在屏幕上可见,我们需要使用engine.runRenderLoop调用来渲染它.现在让我们看看这是如何完成的.
engine.runRenderLoop(function() {
   scene.render();
});
Engine.runRenderLoop函数调用scene.render,它将渲染场景并使其对用户可见.最终的.html看起来如下 :
<!doctype html>
<html>
   <head>
      <meta charset = "utf-8">
      <title>BabylonJs - Basic Element-Creating Scene</title>
      <script src = "babylon.js"></script>
      <style>
         canvas {width: 100%; height: 100%;}
      </style>
   </head>

   <body>
      <canvas id = "renderCanvas"></canvas>
      <script type = "text/javascript">
         var canvas = document.getElementById("renderCanvas");
         var engine = new BABYLON.Engine(canvas, true);
         var createScene  = function() {
            var scene = new BABYLON.Scene(engine);
            scene.clearColor = new BABYLON.Color3(1, 0.8, 0.8);
            return scene;
         };
         var scene = createScene();
         engine.runRenderLoop(function() {
            scene.render();
         });
      </script>
   </body>
</html>
将上述文件保存为basicscene.html并检查浏览器中的输出.显示的屏幕为粉红色,如下图所示 :

现在我们有了场景,我们必须添加相机.
下面给出的代码将相机添加到场景中.有许多类型的相机可以在巴比伦使用.
ArcRotateCamera 是一个围绕目标旋转的相机.它可以通过鼠标,光标或触摸事件进行控制.所需的参数是名称,alpha,beta,半径,目标和场景.让我们在后续章节中讨论相机的细节.
var camera = new BABYLON.ArcRotateCamera("Camera", 1, 0.8, 10, new BABYLON.Vector3(0, 0, 0), scene);现在,我们需要了解如何添加灯光.
灯光用于产生漫反射和镜面反射颜色每个像素接收.有许多类型的灯.我们将了解灯光部分中不同类型的灯光.
这里我在场景中使用PointLight. PointLight像Sun一样向各个方向发射.参数是名称,位置和要使用的场景.
要添加灯光,请执行以下代码 :
var light0 = new BABYLON.PointLight("Omni", new BABYLON.Vector3(0, 0, 10), scene);现在让我们看看如何添加形状.
上面共享的demo有4个形状.
Sphere
Torus
Box
Cylinder
要添加球体,请执行以下代码 :
var origin = BABYLON.Mesh.CreateSphere("origin", 10, 1.0, scene);添加球体后,代码如下所示;
<!doctype html>
<html>
   <head>
      <meta charset="utf-8">
      <title>MDN Games: Babylon.js demo - shapes</title>
      <script src = "babylon.js"></script>
      <style>
         html,body,canvas { margin: 0; padding: 0; width: 100%; height: 100%; font-size: 0; }
      </style>
   </head>

   <body>
      <canvas id = "renderCanvas"></canvas>
      <script type = "text/javascript">
         var canvas = document.getElementById("renderCanvas");
         var engine = new BABYLON.Engine(canvas, true);

         var createScene  = function() {
            var scene = new BABYLON.Scene(engine);
            scene.clearColor = new BABYLON.Color3(1, 0.8, 0.8);
            var camera = new BABYLON.ArcRotateCamera("Camera", 1, 0.8, 10, new BABYLON.Vector3(0, 0, 0), scene);
            var light0 = new BABYLON.PointLight("Omni", new BABYLON.Vector3(0, 0, 10), scene);
            var origin = BABYLON.Mesh.CreateSphere("origin", 10, 1.0, scene);
            scene.activeCamera.attachControl(canvas);
            return scene;
         };
         var scene = createScene();
         engine.runRenderLoop(function() {
            scene.render();
         });
      </script>
   </body>
</html>以上代码生成以下输出 :

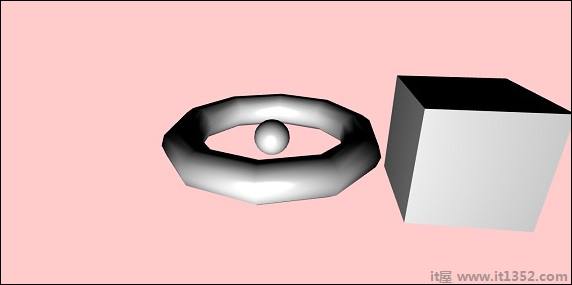
现在让我们添加其他形状 - 圆环和盒子.执行以下代码添加Torus形状.
var torus = BABYLON.Mesh.CreateTorus("torus", 5, 1, 10, scene, false);
var box = BABYLON.Mesh.CreateBox("box", 3.0, scene);
box.position = new BABYLON.Vector3(-5, 0, 0);
我们将在框中添加一个位置. BABYLON.Vector3(-5,0,0)取x,y和z方向.
执行时,上面的代码生成以下输出 :
现在让我们添加上面屏幕截图中显示的最终形状 - 圆柱体.
var cylinder = BABYLON.Mesh.CreateCylinder("cylinder", 3, 3, 3, 6, 1, scene, false);
cylinder.position = new BABYLON.Vector3(5, 0, 0);
该位置被添加到x方向5的柱面上.最终代码如下所示 :
<!doctype html>
<html>
   <head>
      <meta charset = "utf-8">
      <title> Babylon.JS : Demo2</title>
      <script src = "babylon.js"></script>
      <style>
         canvas { width: 100%; height: 100%;}
      </style>
   </head>

   <body>
      <canvas id = "renderCanvas"></canvas>
      <script type = "text/javascript">
         var canvas = document.getElementById("renderCanvas");
         var engine = new BABYLON.Engine(canvas, true);
         var createScene  = function() {
            var scene = new BABYLON.Scene(engine);
            scene.clearColor = new BABYLON.Color3(1, 0.8, 0.8);

            var camera = new BABYLON.ArcRotateCamera("Camera", 1, 0.8, 10, new BABYLON.Vector3(0, 0, 0), scene);
            scene.activeCamera.attachControl(canvas);

            var light0 = new BABYLON.PointLight("Omni", new BABYLON.Vector3(0, 0, 10), scene);

            var origin = BABYLON.Mesh.CreateSphere("origin", 10, 1.0, scene);

            var torus = BABYLON.Mesh.CreateTorus("torus", 5, 1, 10, scene, false);

            var box = BABYLON.Mesh.CreateBox("box", 3.0, scene);
            box.position = new BABYLON.Vector3(-5, 0, 0);

            var cylinder = BABYLON.Mesh.CreateCylinder("cylinder", 3, 3, 3, 6, 1, scene, false);
            cylinder.position = new BABYLON.Vector3(5, 0, 0);
            return scene;
         };
         var scene = createScene();
         engine.runRenderLoop(function() {
            scene.render();
         });
      </script>
   </body>
</html>执行时,上面的代码将生成以下输出 :
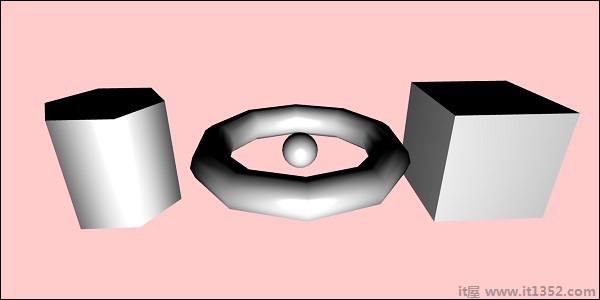
形状将按照移动光标的方向移动;使用摄像机的附加控制到场景也是如此.
scene.activeCamera.attachControl(canvas);
现在让我们详细讨论每个形状.
这是所有形状和语法的总结和减号;
| Sr.No | Shape | 语法 |
|---|---|---|
| 1 | Box | var box = BABYLON.Mesh.CreateBox( "box",6.0,scene,false,BABYLON.Mesh.DEFAULTSIDE); |
| 2 | Sphere | var sphere = BABYLON.Mesh.CreateSphere( "sphere",10.0,10.0,scene, false,BABYLON. Mesh.DEFAULTSIDE); |
| 3 | Plane | var plane = BABYLON.Mesh.CreatePlane( "plane",10.0,scene,false,BABYLON.Mesh.DEFAULTSIDE); |
| 4 | Disc | var disc = BABYLON.Mesh.CreateDisc( "disc",5,30,scene,false,BABYLON.Mesh.DEFAULTSIDE); |
| 5 | Cylinder | var cylinder = BABYLON.Mesh.CreateCylinder( "cylinder",3,3,3,6,1,scene, false, BABYLON.Mesh.DEFAULTSIDE); |
| 6 | Torus | var torus = BABYLON.Mesh.CreateTorus( "torus",5,1 ,10,场景,假, BABYLON.Mesh.DEFAULTSIDE); |
| 7 | Knot | var knot = BABYLON.Mesh.CreateTorusKnot( "knot",2,0.5,128,64,2,3,scene,false, BABYLON.Mesh.DEFAULTSIDE); |
| 8 | Line Mesh |
 var lines = BABYLON.Mesh.CreateLines("lines",[
 new BABYLON.Vector3(-10,0,0),
 new BABYLON .Vector3(10,0,0),
新BABYLON.Vector3(0,0,-10),
新BABYLON.Vector3(0,0,10)
],场景) ; |
| 9 | Dashes Lines | var dashedlines = BABYLON.Mesh.CreateDashedLines( "dashedLines",[v1,v2,... vn], dashSize,gapSize,dashNb,scene); |
| 10 | Ribbon | var ribbon = BABYLON.Mesh.CreateRibbon ( "ribbon", [path1,path2,...,pathn], false,false,0, 场景,false, BABYLON.Mesh .DEFAULTSIDE); |
| 11 | Tube | var tube = BABYLON.Mesh.CreateTube( "tube", [V1, V2,...,Vn], 半径,tesselation, radiusFunction, 上限,场景,假, BABYLON.Mesh.DEFAULTSIDE); |
| 12 | Ground | var ground = BABYLON.Mesh.CreateGround ( "地面",6,6,2,场景); |
| 13 | Ground From HeightMap | var ground = BABYLON.Mesh.CreateGroundFromHeightMap( "ground","heightmap.jpg",200,200,250,0,10 , scene,false,successCallback); |
| 14 | Tiled Ground | var precision = {"w":2,"h":2};
var subdivisions = {'h':8,'w':8};
var tilesGround = BABYLON.Mesh.CreateTiledGround(
"Tiled Ground",-3,-3,3,3,
细分,精度,场景,假); |
在本节中,我们将学习如何定位,旋转或缩放我们目前添加的元素.
我们创建了box,sphere ,圆柱,结等现在,我们将看到如何定位,缩放和旋转形状.
| Sr.No. | 元素&说明 |
|---|---|
| 1 | Position 随着位置变化,网格将从一个位置更改为另一个位置. |
| 2 | Rotation 旋转时,网格将围绕网格旋转. |
| 3 | Scaling 网格的缩放可以相对于x,y或z轴完成. |
使用Parenting,我们将在网格之间创建父子关系,并查看它们的行为方式.因此,无论您应用于父级的转换,同样也将应用于子级.现在让我们通过下面的演示了解相同的内容.
<!doctype html>
<html>
   <head>
      <meta charset = "utf-8">
      <title>BabylonJs - Basic Element-Creating Scene</title>
      <script src = "babylon.js"></script>
      <style>
         canvas {width: 100%; height: 100%;}
      </style>
   </head>

   <body>
      <canvas id = "renderCanvas"></canvas>
      <script type = "text/javascript">
         var canvas = document.getElementById("renderCanvas");
         var engine = new BABYLON.Engine(canvas, true);
         var createScene  = function() {
            var scene = new BABYLON.Scene(engine);
            scene.clearColor = new BABYLON.Color3(0, 1, 0);

            var camera = new BABYLON.ArcRotateCamera("Camera", 1, 0.8, 10, new BABYLON.Vector3(0, 0, 0), scene);
            scene.activeCamera.attachControl(canvas);

            var light = new BABYLON.PointLight("Omni", new BABYLON.Vector3(0, 100, 100), scene);

            var boxa = BABYLON.Mesh.CreateBox("BoxA", 1.0, scene);
            boxa.position = new BABYLON.Vector3(0,0.5,0);

            var boxb = BABYLON.Mesh.CreateBox("BoxB", 1.0, scene);
            boxb.position = new BABYLON.Vector3(3,0.5,0);
            boxb.scaling = new BABYLON.Vector3(2,1,2);

            var boxc = BABYLON.Mesh.CreateBox("BoxC", 1.0, scene);
            boxc.parent = boxb;
            boxc.position.z = -3;

            var ground = BABYLON.Mesh.CreateGround("ground1", 10, 6, 2, scene);
            ground.position = new BABYLON.Vector3(0,0,0);
            return scene;
         };
         var scene = createScene();
         engine.runRenderLoop(function() {
            scene.render();
         });
      </script>
   </body>
</html>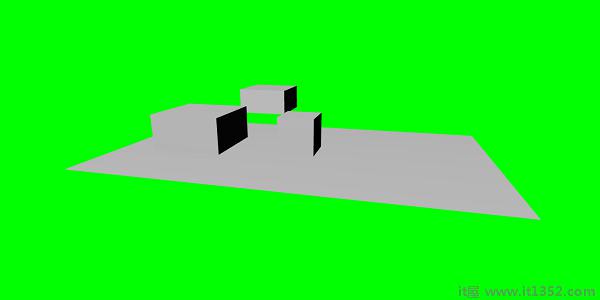
我们在上面的网格中创建了3个框.在演示中,应用了boxb缩放,并将其指定为boxc的父级,boxc也可以缩放,因为它的父boxb和缩放比例相同.您可以使用该演示来查看父子链接的工作原理.
要制作网格,您必须使用另一个网格的父级并减去;
child.parent = parentmesh;
现在让我们讨论本节中的场景环境.我们将在场景中讨论场景背景颜色,环境色,天空盒,雾模式等.
我们已经看到了场景背景色是我们迄今为止创建的演示.
现在让我们看看场景背景颜色的工作原理.
以下是场景背景颜色的语法 :
scene.clearColor = new BABYLON.Color3(0.5, 0.8, 0.5);
or
scene.clearColor = BABYLON.Color3.Blue();
以上属性将更改场景的背景颜色.
现在让我们看看场景环境颜色是如何工作的.
以下是场景环境颜色的语法 :
scene.ambientColor = new BABYLON.Color3(0.3, 0.3, 0.3);
AmbientColor与 StandardMaterial 环境颜色和纹理一起使用.如果场景没有ambientColor,则 StandardMaterial.ambientColor 和 StandardMaterial.ambientTexture 无效.应用ambientColor for scene后,StandardMaterial ambientColor/ambientTexture将变为活动状态.默认情况下,场景被赋予 scene.ambientColor 并设置为 Color3 (0,0,0),这意味着没有ambientColor.
我们现在将了解场景模式的工作原理.
关注是场景模式的语法.
scene.fogMode = BABYLON.Scene.FOGMODE_EXP;
以下可用雾模式列表 :
BABYLON.Scene.FOGMODE_NONE : 默认值为1,雾已停用.
BABYLON.Scene.FOGMODE_EXP : 雾密度遵循指数函数.
BABYLON.Scene.FOGMODE_EXP2 : 与上述相同但更快.
BABYLON.Scene.FOGMODE_LINEAR : 雾密度遵循线性函数.
如果定义雾模式EXP或EXP2,则可以将其上的密度定义为跟随&减去;
scene.fogDensity = 0.01;
如果雾模式为LINEAR,则可以定义雾开始和结束的位置,如下所示;
 scene.fogStart = 20.0;
 scene.fogEnd = 60.0;
要为雾提供颜色,请执行以下代码 :
scene.fogColor = new BABYLON.Color3(0.9,0.9,0.85);
Skybox是一种在游戏中创建背景的方式,使场景看起来更逼真.它更像是一个围绕屏幕的包装材料,它覆盖了用于材料的纹理.正确选择图像,使其对于您要创建的场景看起来很逼真.要创建天空盒,您必须创建一个框并向其应用材质.我们将在后续章节中详细讨论不同的材料.
现在,我们将看到如何使用框和材料创建天空盒.
var skybox = BABYLON.Mesh.CreateBox("skyBox",100.0,scene);我们将创建一个100大小的框,以便它覆盖整个场景.我们将首先给出框中的材料,如下所示:
var skyboxMaterial = new BABYLON.StandardMaterial("skyBox",scene );对于这些材料,我们将分配属性.
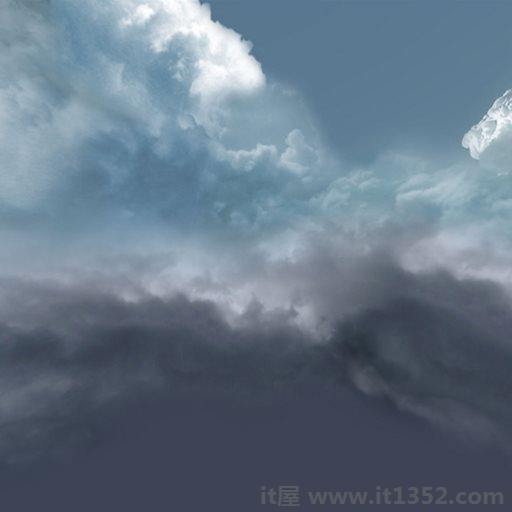
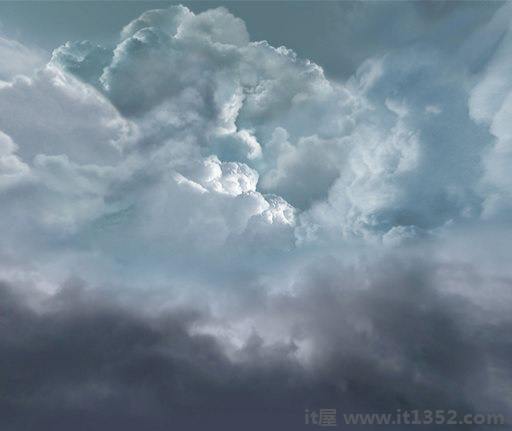
skyboxMaterial .reflectionTexture = new BABYLON.CubeTexture("images/cubetexture/skybox",scene);我们必须使用反射纹理,它主要用于创建类似镜像的材质.反射纹理属性使用CubeTexture,它将图像作为输入.由于立方体有6个面,因此天空盒所需的图像必须为6,即在内部它必须存储为skybox_nx,skybox_ny,skybox_nz,skybox_px,skybox_py,skybox_pz.用于天空盒的图像粘贴在下面;它们是六面上立方体的面孔.将纹理应用于形状时,它会提供所用图像的详细信息,并使场景看起来更逼真.我们使用坐标模式作为SKYBOX_MODE,如下所示 :
skyboxMaterial.reflectionTexture.coordinatesMode = BABYLON.Texture.SKYBOX_MODE;
还有其他属性用于材质,如backfaceCulling,diffuseColor,specularColor,disableLighting等.属性在材料部分详细说明.
在演示中,我们将展示使用skybox创建的环境场景,在场景中旋转的球体和移动的平面.雾被应用于场景,旋转时会注意到.
<!doctype html>
<html>
   <head>
      <meta charset = "utf-8">
      <title> Babylon.JS : Demo</title>
      <script src = "babylon.js"></script>
      <style>
         canvas { width: 100%; height: 100%;}
      </style>
   </head>

   <body>
      <canvas id = "renderCanvas"></canvas>
      <script type = "text/javascript">
         var canvas = document.getElementById("renderCanvas");
         var engine = new BABYLON.Engine(canvas, true);
         var createScene  = function() {
            var scene = new BABYLON.Scene(engine);
            var light = new BABYLON.PointLight("Omni",
            new BABYLON.Vector3(10, 50, 50), scene);

            var camera = new BABYLON.ArcRotateCamera("Camera", 0.4, 1.2, 20, new BABYLON.Vector3(-10, 0, 0), scene);
            camera.attachControl(canvas, true);

            var material1 = new BABYLON.StandardMaterial("mat1", scene);
            material1.diffuseTexture = new BABYLON.Texture("images/tsphere.jpg", scene);

            var sphere = BABYLON.Mesh.CreateSphere("red", 32, 2, scene);
            sphere.setPivotMatrix(BABYLON.Matrix.Translation(2, 0, 0));
            sphere.material = material1;

            // Fog
            scene.fogMode = BABYLON.Scene.FOGMODE_EXP;
            scene.fogColor = new BABYLON.Color3(0.9, 0.9, 0.85);
            scene.fogDensity = 0.01;

            //skybox
            var skybox = BABYLON.Mesh.CreateBox("skyBox", 100.0, scene);

            var skyboxMaterial = new BABYLON.StandardMaterial("skyBox", scene);
            skyboxMaterial.backFaceCulling = false;

            skyboxMaterial.reflectionTexture = new BABYLON.CubeTexture("images/cubetexture/skybox", scene);
            skyboxMaterial.reflectionTexture.coordinatesMode = BABYLON.Texture.SKYBOX_MODE;

            skyboxMaterial.diffuseColor = new BABYLON.Color3(0, 0, 0);

            skyboxMaterial.specularColor = new BABYLON.Color3(0, 0, 0);

            skyboxMaterial.disableLighting = true;
            skybox.material = skyboxMaterial;


            var spriteManagerPlayer = new BABYLON.SpriteManager("playerManager", "images/plane.png", 8, 1000, scene);

            var plane = new BABYLON.Sprite("plane", spriteManagerPlayer);
            plane.position.x = -2;
            plane.position.y = 2;
            plane.position.z = 0;


            var alpha = 0;
            var x = 2;
            var y = 0;
            scene.registerBeforeRender(function () {
               scene.fogDensity = Math.cos(alpha) / 10;
               alpha += 0.02;
               sphere.rotation.y += 0.01;
               y += 0.05;
               if (x > 50) {
                  x = -2;
               }
               plane.position.x = -x;
               x += 0.02;
            });
            return scene;
         };
         var scene = createScene();
         engine.runRenderLoop(function() {
            scene.render();
         });
      </script>
   </body>
</html>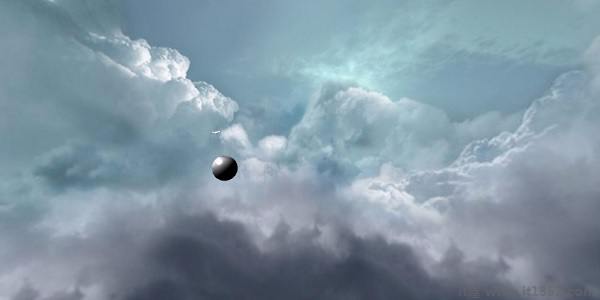
In the above example, we used the following code for fog :
 scene.fogMode = BABYLON.Scene.FOGMODE_EXP;
 scene.fogColor = new BABYLON.Color3(0.9, 0.9, 0.85);
 scene.fogDensity = 0.01;
scene.fogMode = BABYLON.Scene.FOGMODE_EXP : Here, the fog density follows an exponential function.
scene.registerBeforeRender = With this, the fog density changes as follows :
 var alpha = 0;
 scene.registerBeforeRender(function () {
    scene.fogDensity = Math.cos(alpha)/10;
    alpha += 0.02;
 });
The value of alpha keeps incrementing by 0.02 as it goes in a loop as in the above function.
Here, we have added a plane sprite image and changed it’s position with the scene.registerBeforeRender function as follows :
 var alpha = 0;
 var x = 2;
 var y = 0;
 scene.registerBeforeRender(function () {
    scene.fogDensity = Math.cos(alpha)/10;
    alpha += 0.02;
    sphere.rotation.y += 0.01;
    y += 0.05;
    if (x > 50) {
       x = -2;
    }
    plane.position.x = -x;
    x += 0.02;
 });
 return scene;
 };s
We will change the x axis of the plane and reset it when it reaches more than 50.
Also, the sphere is rotated along the y axis. This is shown in the above example.The value is changed using sphere.rotation.y.
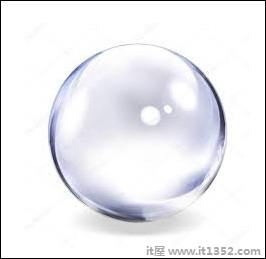
The texture used for sphere is : images/tshphere.jpg. The images are stored in images/folder locally and also pasted below for reference. You can download any image of your choice and use in the demo link.
We need six images for a cube. The images are stored locally in images/cubetexture/folder. You can download any image of your choice, but when you save it save them as nameoftheimage_nx, nameoftheimage_ny, nameoftheimage_nz,nameoftheimage_px, nameoftheimage_py, nameoftheimage_pz. Please note the images chosen should be in a sequence so that the background looks realistic like the one shown for skybox.
The images used for making a skybox are as follows : images/cubetexture/skybox
skybox_nx
skybox_ny

skybox_nz
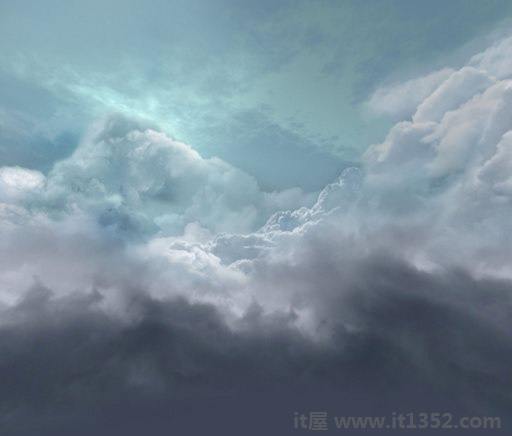
skybox_px
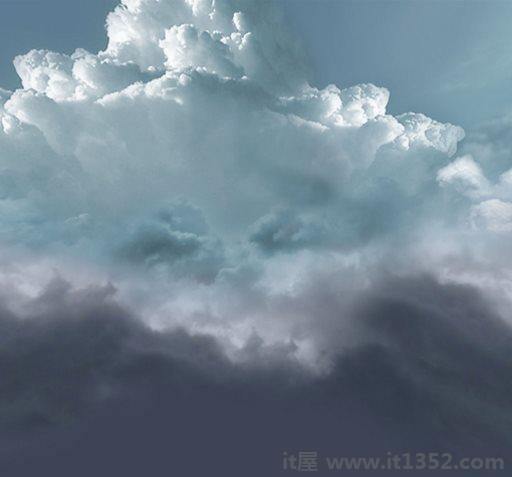
skybox_py
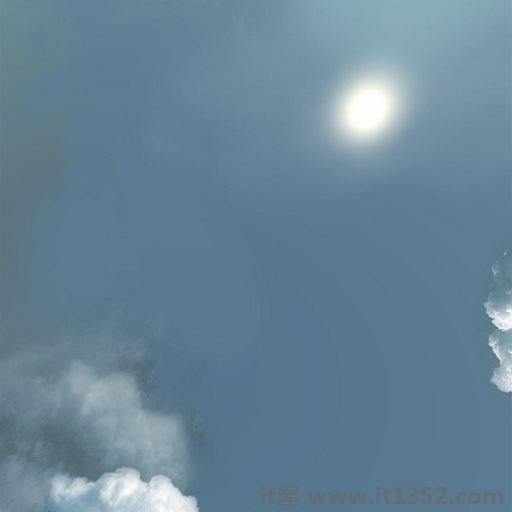
skybox_pz