Express是一个极小且灵活的Node.js Web应用程序框架,它提供了一组强大的功能来开发Web和移动应用程序.它有助于基于节点的Web应用程序的快速开发.以下是Express框架的一些核心功能 :
允许设置中间件以响应HTTP请求.
定义一个路由表,用于根据HTTP方法和URL执行不同的操作.
允许基于将参数传递给模板来动态呈现HTML页面.
首先,使用NPM全局安装Express框架,以便可以使用节点终端创建Web应用程序.
$ npm install express --save
上面的命令将安装本地保存在 node_modules 目录中,并在node_modules中创建一个目录express.您应该安装以下重要模块以及express :
body-parser : 这是一个node.js中间件,用于处理JSON,Raw,Text和URL编码的表单数据.
cookie-parser : 解析Cookie标头并使用由cookie名称键入的对象填充req.cookies.
multer : 这是一个用于处理multipart/form-data的node.js中间件.
 $ npm install body-parser --save
 $ npm install cookie-parser --save
 $ npm install multer --save
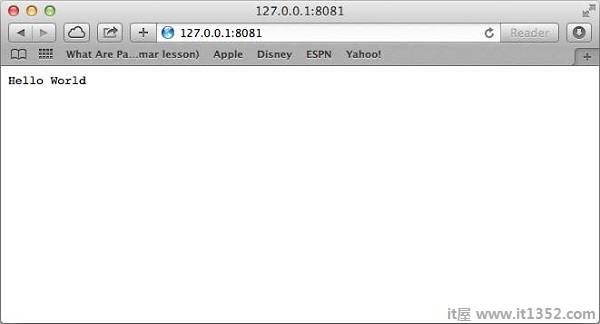
以下是一个非常基本的Express应用程序,它启动服务器并侦听端口8081以进行连接.该应用程序以 Hello World!响应主页的请求.对于其他所有路径,它将以 404 Not Found.
var express = require('express');
var app = express();

app.get('/', function (req, res) {
   res.send('Hello World');
})

var server = app.listen(8081, function () {
   var host = server.address().address
   var port = server.address().port

   console.log("Example app listening at http://%s:%s", host, port)
})
保存上面的代码名为server.js,并使用以下命令运行它.
$ node server.js
您将看到以下输出 :
Example app listening at http://0.0.0.0:8081
在任何浏览器中打开http://127.0.0.1:8081/以查看以下结果.
Express应用程序使用一个回调函数,其参数为请求和响应对象.
app.get('/', function (req, res) {
   // --
})
Request Object : 请求对象表示HTTP请求,并具有请求查询字符串,参数,正文,HTTP标头等的属性.
响应对象 : 响应对象表示Express应用程序在收到HTTP请求时发送的HTTP响应.
您可以打印 req 和 res 提供大量与HTTP请求和响应相关的信息的对象,包括cookie,会话,URL等.
我们已经看到了一个为主页提供HTTP请求的基本应用程序.路由是指确定应用程序如何响应对特定端点的客户端请求,该请求是URI(或路径)和特定的HTTP请求方法(GET,POST等).
我们将扩展我们的Hello World程序以处理更多类型的HTTP请求.
var express = require('express');
var app = express();
// This responds with "Hello World" on the homepage
app.get('/', function (req, res) {
console.log("Got a GET request for the homepage");
res.send('Hello GET');
})
// This responds a POST request for the homepage
app.post('/', function (req, res) {
console.log("Got a POST request for the homepage");
res.send('Hello POST');
})
// This responds a DELETE request for the /del_user page.
app.delete('/del_user', function (req, res) {
console.log("Got a DELETE request for /del_user");
res.send('Hello DELETE');
})
// This responds a GET request for the /list_user page.
app.get('/list_user', function (req, res) {
console.log("Got a GET request for /list_user");
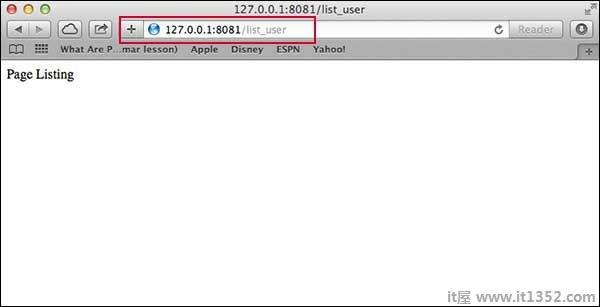
res.send('Page Listing');
})
// This responds a GET request for abcd, abxcd, ab123cd, and so on
app.get('/ab*cd', function(req, res) {
console.log("Got a GET request for /ab*cd");
res.send('Page Pattern Match');
})
var server = app.listen(8081, function () {
var host = server.address().address
var port = server.address().port
console.log("Example app listening at http://%s:%s", host, port)
})将上述代码保存在名为server.js的文件中,并使用以下命令运行它.
$ node server.js
您将看到以下输出 :
Example app listening at http://0.0.0.0:8081
现在您可以尝试不同的请求在http://127.0.0.1:8081查看server.js生成的输出.以下是一些屏幕截图,显示了不同网址的不同响应.
屏幕再次显示http://127.0.0.1:8081/list_user
屏幕再次显示http://127.0.0.1:8081/abcd
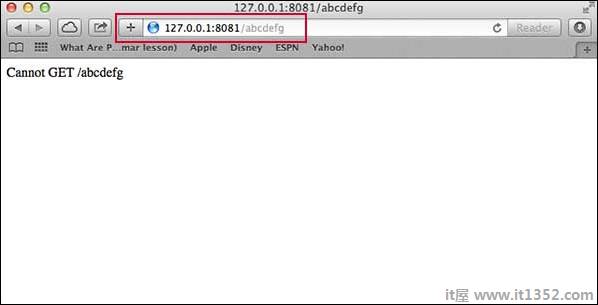
屏幕再次显示http://127.0.0.1:8081/abcdefg
Express提供了一个内置的中间件 express.static 来提供静态文件,例如图像,CSS,JavaScript等.
你只需要传递名字保存静态资产的目录,以及 express.static 中间件,以便直接开始提供文件.例如,如果将图像,CSS和JavaScript文件保存在名为public的目录中,则可以执行以下操作 :
app.use(express.static('public'));我们将在 public/images 子目录中保留一些图像,如下所示 :
 node_modules
 server.js
 public/
 public/images
 public/images/logo.png
让我们修改"Hello Word"应用程序以添加处理静态文件的功能.
var express = require('express');
var app = express();

app.use(express.static('public'));

app.get('/', function (req, res) {
   res.send('Hello World');
})

var server = app.listen(8081, function () {
   var host = server.address().address
   var port = server.address().port

   console.log("Example app listening at http://%s:%s", host, port)
})
保存上面的代码名为server.js,并使用以下命令运行它.
$ node server.js
现在在任何浏览器中打开http://127.0.0.1:8081/images/logo.png并查看以下结果.
这是一个使用两个值传递的简单示例HTML FORM GET方法.我们将在server.js中使用 process_get 路由器来处理此输入.
<html>
   <body>

      <form action = "http://127.0.0.1:8081/process_get" method = "GET">
         First Name: <input type = "text" name = "first_name">  <br>
         Last Name: <input type = "text" name = "last_name">
         <input type = "submit" value = "Submit">
      </form>

   </body>
</html>
让我们在index.htm中保存上面的代码并修改server.js来处理主页请求以及HTML表单发送的输入.
var express = require('express');
var app = express();

app.use(express.static('public'));
app.get('/index.htm', function (req, res) {
   res.sendFile( __dirname + "/" + "index.htm" );
})

app.get('/process_get', function (req, res) {
   // Prepare output in JSON format
   response = {
      first_name:req.query.first_name,
      last_name:req.query.last_name
   };
   console.log(response);
   res.end(JSON.stringify(response));
})

var server = app.listen(8081, function () {
   var host = server.address().address
   var port = server.address().port

   console.log("Example app listening at http://%s:%s", host, port)
})
使用 http://127.0.0.1:8081/index.htm 访问HTML文档将生成以下形式 :
现在您可以输入名字和姓氏,然后点击提交按钮查看结果,它应该返回以下结果 :
{"first_name":"John","last_name":"Paul"}这是一个使用HTML FORM POST方法传递两个值的简单示例.我们将在server.js中使用 process_get 路由器来处理此输入.
<html>
   <body>

      <form action = "http://127.0.0.1:8081/process_post" method = "POST">
         First Name: <input type = "text" name = "first_name"> <br>
         Last Name: <input type = "text" name = "last_name">
         <input type = "submit" value = "Submit">
      </form>

   </body>
</html>
让我们在index.htm中保存上面的代码并修改server.js来处理主页请求以及HTML表单发送的输入.
var express = require('express');
var app = express();
var bodyParser = require('body-parser');

// Create application/x-www-form-urlencoded parser
var urlencodedParser = bodyParser.urlencoded({ extended: false })

app.use(express.static('public'));
app.get('/index.htm', function (req, res) {
   res.sendFile( __dirname + "/" + "index.htm" );
})

app.post('/process_post', urlencodedParser, function (req, res) {
   // Prepare output in JSON format
   response = {
      first_name:req.body.first_name,
      last_name:req.body.last_name
   };
   console.log(response);
   res.end(JSON.stringify(response));
})

var server = app.listen(8081, function () {
   var host = server.address().address
   var port = server.address().port

   console.log("Example app listening at http://%s:%s", host, port)
})
使用 http://127.0.0.1:8081/index.htm 访问HTML文档将生成以下形式 :
现在您可以输入名字和姓氏,然后点击提交按钮查看以下内容结果 :
{"first_name":"John","last_name":"Paul"}以下HTML代码创建文件上传器表单.此表单的方法属性设置为 POST ,enctype属性设置为 multipart/form-data
<html>
   <head>
      <title>File Uploading Form</title>
   </head>

   <body>
      <h3>File Upload:</h3>
      Select a file to upload: <br />

      <form action = "http://127.0.0.1:8081/file_upload" method = "POST"
         enctype = "multipart/form-data">
         <input type="file" name="file" size="50" />
         <br />
         <input type = "submit" value = "Upload File" />
      </form>

   </body>
</html>
让我们在index.htm中保存上面的代码并修改server.js来处理主页请求以及文件上传.
var express = require('express');
var app = express();
var fs = require("fs");

var bodyParser = require('body-parser');
var multer  = require('multer');

app.use(express.static('public'));
app.use(bodyParser.urlencoded({ extended: false }));
app.use(multer({ dest: '/tmp/'}));

app.get('/index.htm', function (req, res) {
   res.sendFile( __dirname + "/" + "index.htm" );
})

app.post('/file_upload', function (req, res) {
   console.log(req.files.file.name);
   console.log(req.files.file.path);
   console.log(req.files.file.type);
   var file = __dirname + "/" + req.files.file.name;

   fs.readFile( req.files.file.path, function (err, data) {
      fs.writeFile(file, data, function (err) {
         if( err ) {
            console.log( err );
            } else {
               response = {
                  message:'File uploaded successfully',
                  filename:req.files.file.name
               };
            }

         console.log( response );
         res.end( JSON.stringify( response ) );
      });
   });
})

var server = app.listen(8081, function () {
   var host = server.address().address
   var port = server.address().port

   console.log("Example app listening at http://%s:%s", host, port)
})
使用 http://127.0.0.1:8081/index.htm 访问HTML文档将生成以下形式 :
File Upload:Select a file to upload:
NOTE: This is just dummy form and would not work, but it must work at your server.
您可以将Cookie发送到Node.js服务器,该服务器可以使用以下中间件处理相同的内容选项.以下是打印客户端发送的所有cookie的简单示例.
var express      = require('express')
var cookieParser = require('cookie-parser')

var app = express()
app.use(cookieParser())

app.get('/', function(req, res) {
   console.log("Cookies: ", req.cookies)
})
app.listen(8081)