FuelPHP通过Fieldset和Fieldset_Field类提供高级表单编程. Fieldset 提供了一种面向对象的方式来创建表单.它完全支持模型.它还内置了对客户端和服务器端验证的支持.要创建完整的表单,只需创建具有适当形式和验证设置的模型即可.让我们在本章中了解Fieldset类以及如何使用它来创建表单.
Fieldset是 Fieldset_Field的集合对象. Fieldset_Field定义表单的单个条目,例如firstname,lastname等,以及验证. Fieldset类具有添加/编辑/删除字段的方法.它具有识别模型中定义的字段并从给定模型创建字段的选项. Fieldset 在后台使用表单和验证类来完成实际工作.让我们看一下Fieldset类的一些重要方法.
forge 创建一个新的Fieldset实例.它有以下两个参数 :
$ name : 字段集的标识符
$ config : 配置数组.可能的选项是 validation_instance 和 form_instance. validation_instance 可以有 Validation 对象, form_instance 可以有Form对象.
$employee_form = Fieldset::forge('employee');instance 按标识符返回先前创建的Fieldset实例.
$employee_form = Fieldset::instance('employee');获取字段集实例的标识符.
$employee_form = Fieldset::forge('employee');
$name = $employee_form->get_name();添加创建一个新的Fieldset_Field实例并将其添加到当前字段集.它包含以下四个参数:
$ name : 字段名称
$ label : 该字段的标签
$ attributes : HTML代码属性
$ rules : 验证规则
$employee_field = $employee_form-> add (
   'employee_lastname',
   'Lastname',
   array ('class' => 'pretty_input')
);

// with validation rules
$employee_form->add (
   'email', 'E-mail',
   array('type' => 'email', 'class' => 'pretty_input'),
   array('required', 'valid_email')
);add_before类似于add,除了它有一个额外的参数来指定新的字段之前将添加已创建的字段.
$employee_form->add_before (
   'employee_firstname',
   'Firstname',
   array ('class' => 'pretty_input'),
   array(),
   'employee_lastname'
);删除从字段集中删除指定的字段.
$employee_form->delete('employee_firstname');字段获取字段集中的所有字段或指定字段.
$fields = $employee_form->field();
$lastname_field = $employee_form->field('employee_lastname');
build 是 $ this->表单的别名() - >建立()的.生成表单的HTML标记.
$employee_form->build(Uri::create('employee/add'));启用重新启用之前已禁用的字段.
$employee_form->enable('employee_firstname');禁用允许禁用字段集中的字段进行构建.
$employee_form->disable('employee_firstname');表单返回当前字段集的Form实例.
$form = employee_form->form();
add_model将模型的字段添加到字段集中.它有以下三个参数:
$ class : 班级名称
$ instance : 要使用值填充字段的类的实例
$ method : 类中方法的名称.此方法用于将字段添加到字段集中. Orm \ Model有必要的方法.默认方法名称为set_form_fields.
$employee_form = Fieldset::forge('employee');
$employee_form->add_model('Model_Employee');populate 使用模型实例设置fieldset中字段的初始值.
$emp = new Model_Employee();
$emp->name = "Jon";
$employee_form->populate($emp);
重新填充与填充相同,只不过它重新填充了fieldset.
验证获取当前字段集的验证实例.
$validation = $employee_form->validation();
$ this-> validation()的别名 - > validated().
输入
别名为$ this-> validation() - > input().
错误
别名为$ this-> validation() - >错误().
show_errors
别名为$ this-> validation() - > show_errors().
让我们创建一个高级表单,使用Fieldset类在我们的示例员工应用程序中添加新员工.
使用必要的验证规则更新员工模型,并按如下方式添加验证观察员.
<?php
   class Model_Employee extends Orm\Model {
      protected static $_connection = 'production';
      protected static $_table_name = 'employee';
      protected static $_primary_key = array('id');

      protected static $_properties = array (
         'id',
         'name' => array (
            'data_type' => 'varchar',
            'label' => 'Employee Name',
            'validation' => array (
               'required',
               'min_length' => array(3),
               'max_length' => array(80)
            ),
            'form' => array (
               'type' => 'text'
            ),
         ),
         'age' => array (
            'data_type' => 'int',
            'label' => 'Employee Age',
            'validation' => array (
               'required',
            ),
            'form' => array ('type' => 'text' ),
         ),
      );

      // Just add the Observer, and define the required event
      protected static $_observers = array('Orm\\Observer_Validation' => array (
         'events' => array('before_save')));
   }
在这里,我们定义了名称和年龄字段的验证规则,并在保存模型之前添加了一个新的观察者来执行服务器端验证进入数据库.相同的验证规则也将在表单中创建必要的输入验证属性.
在员工控制器中创建新操作,action_advancedform为接下来.
public function action_advancedform() {

   // create a new fieldset and add employee model
   $fieldset = Fieldset::forge('employee')->add_model('Model_Employee');

   // get form from fieldset
   $form = $fieldset->form();

   // add submit button to the form
   $form->add('Submit', '', array('type' => 'submit', 'value' => 'Submit'));

   // build the form  and set the current page as action
   $formHtml = $fieldset->build(Uri::create('employee/advancedform'));

   // set form in data
   $data = array();
   $data['form'] = $formHtml;
   return Response::forge(View::forge('employee/advancedform', $data, false));
}
在这里,我们使用fieldset创建了表单并将表单发送到视图.接下来,添加操作视图, fuel/app/views/employee/advancedform.php ,如下所示.
public function action_advancedform() {
// create a new fieldset and add employee model
$fieldset = Fieldset::forge('employee')->add_model('Model_Employee');
// get form from fieldset
$form = $fieldset->form();
// add submit button to the form
$form->add('Submit', '', array('type' => 'submit', 'value' => 'Submit'));
// build the form and set the current page as action
$formHtml = $fieldset->build(Uri::create('employee/advancedform'));
// set form in data
$data = array();
$data['form'] = $formHtml;
return Response::forge(View::forge('employee/advancedform', $data, false));
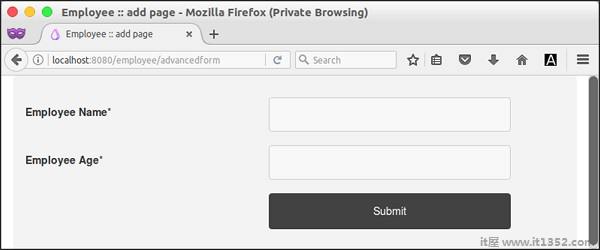
}现在,请求页面 http://localhost:8080/employee/add 将显示以下表格.
更新操作方法 action_advancedform 以处理表单,并将用户输入的员工数据添加到员工控制器的数据库中,如下所示.
<!DOCTYPE html>
<html lang = "en">

   <head>
      <title>Employee :: add page</title>
      <meta charset = "utf-8">
      <meta name = "viewport" content = "width = device-width, initial-scale = 1">
      <?php echo Asset::css('bootstrap.css'); ?>

      <style>
         table {
            width: 90%;
         }
         table tr {
            width: 90%
         }
         table tr td {
            width: 50%
         }
         input[type = text], select {
            width: 100%;
            padding: 12px 20px;
            margin: 8px 0;
            display: inline-block;
            border: 1px solid #ccc;
            border-radius: 4px;
            box-sizing: border-box;
         }
         input[type = submit] {
            width: 100%;
            background-color: #3c3c3c;
            color: white;
            padding: 14px 20px;
            margin: 8px 0;
            border: none;
            border-radius: 4px;
            cursor: pointer;
         }
         div {
            border-radius: 5px;
            background-color: #f2f2f2;
            padding: 20px;
         }
      </style>
   </head>

   <body>
      <div class = "container">
         <?php
            if(isset($errors)) {
               echo $errors;
            }
            echo $form;
         ?>
      </div>
   </body>

</html>
这里,一旦用户输入的数据被验证并保存到数据库中,我们就被重定向到员工列表页面.否则,我们将再次显示该表单.
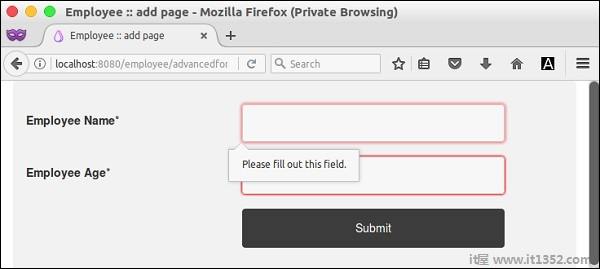
现在,请求URL, http://localhost: 8080/employee/add 并输入一些员工数据并提交表格.如果未提供数据,则表单将提示用户输入数据,如以下屏幕截图所示.
如果用户绕过客户端验证,则服务器将验证表单并显示错误,如以下屏幕截图所示.

如果数据通过客户端和服务器端验证,那么员工数据将被保存进入数据库,页面被重定向到列表页面.