在本章中,我们将介绍REST API.这不是传统的API,我们有一组包含类型的库,这些类型包含属性和方法.
REST API是基于以数据为中心的Web服务实现的开放数据协议或OData.这些Web服务的工作方式,使用系统中的每个资源都可以通过传递给服务器的特定URL进行寻址.
让我们在Internet Explorer中查看这个SharePoint站点是开放的.
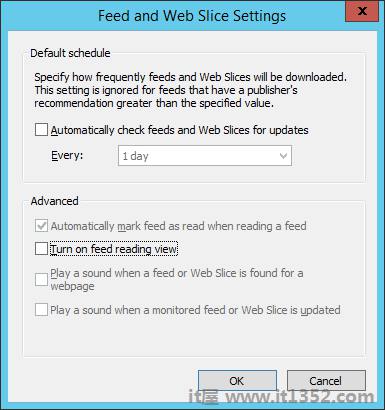
第1步 : 如果您使用的是Internet Explorer,请转到Internet Explorer设置,然后在"内容"选项卡上,选择"源和Web切片"的设置,如下面的屏幕截图所示.

您将看到以下对话框.确保 Feed阅读视图 关闭,然后点击确定.
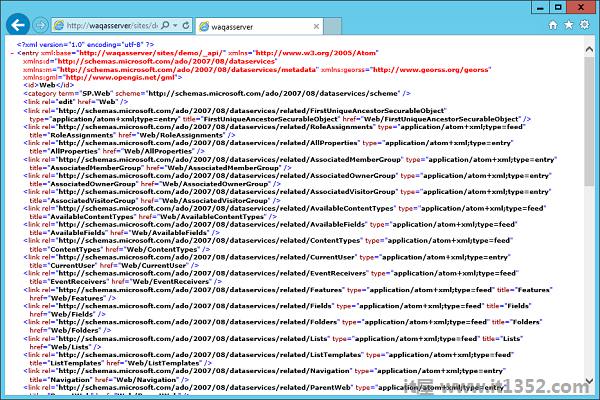
步骤2 : 现在让我们将URL更改为站点URL+/_ api/web并按Enter键.
现在您应该获得一个类似于以下屏幕截图的视图.
我们需要有关当前网站或当前网站的信息.因此,站点URL+/_ api是SharePoint 2013 REST API的基本URL,Web是我们的查询.我们需要有关当前网络的信息.
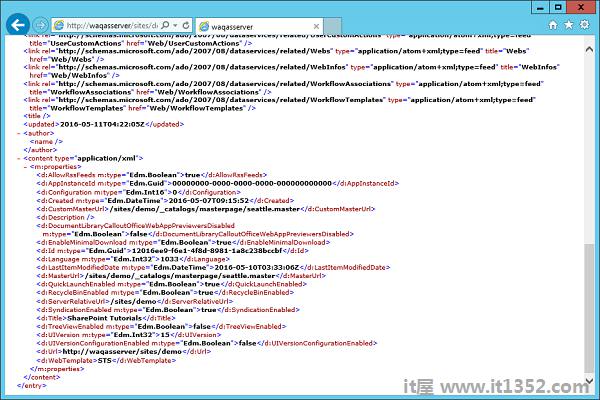
我们收到一份XML文档,如果我们向下滚动,我们将获得有关当前网络的信息.
接下来,如果您想了解网络中的列表,可以将列表附加到你的网址.我们将获取有关当前站点中所有列表的信息集合,而不是单个对象的信息.
当我们使用浏览器时,我们向服务器发出了get请求,这意味着我们想要检索信息.但是,我们也可以执行其余的标准CRUD操作.

SharePoint 2013 REST API不公开元数据.因此,当我们在托管代码中使用它时,我们无法使用Visual Studio使用服务引用对话框生成服务代理.相反,我们可以使用类似http web请求对象的Web客户端的类型向服务器发送请求,然后返回原始结果.
这些结果是否返回为XML或JSON由我们随请求发送的accept头确定.
如果我们返回XML,那么我们可以使用LINQ to XML从我们的应用程序所需的响应中检索信息.
如果我们返回JSON,那么我们可以使用其中一种JSON序列化以将JSON解析为.NET对象,然后使用它来检索我们需要的信息.
使用REST API时在JavaScript中,我们可以使用jQuery或SP.RequestExecutor对象来调用服务.就像在托管代码示例中一样,我们可以控制是否使用accept标头返回XML或JSON.因为我们大多数时候都在使用JavaScript,所以我们想要回到JSON.
另外需要注意的是当你构建服务的URL时,我们可以使用 _spPageContextInfo 对象从站点获取绝对URL,然后只需将服务URL和查询附加到它.这是因为REST API服务不公开元数据而您无法在Visual Studio中创建服务引用,使用托管代码中的REST API实际上是非首发.
我们采取看一下通过创建一个新项目从JavaScript调用REST API.
步骤1 : 在中间窗格中选择 App for SharePoint ,然后输入项目名称.点击确定.
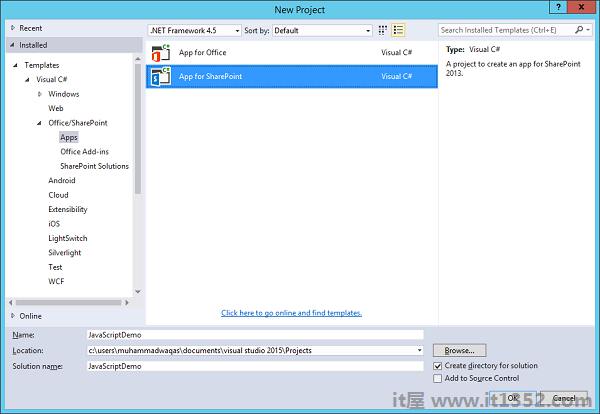
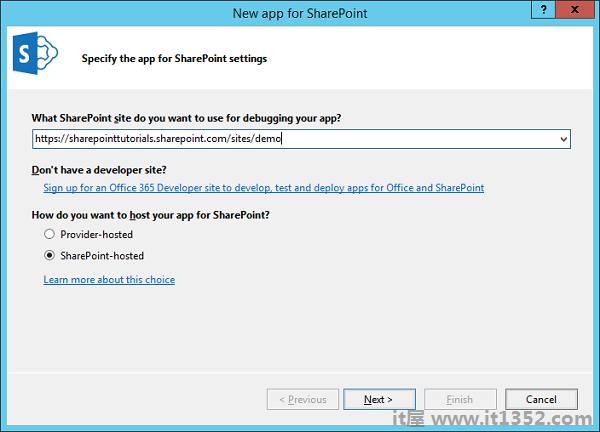
第2步 : 输入您的站点URL并选择 SharePoint托管的选项,然后单击"下一步".单击"完成".
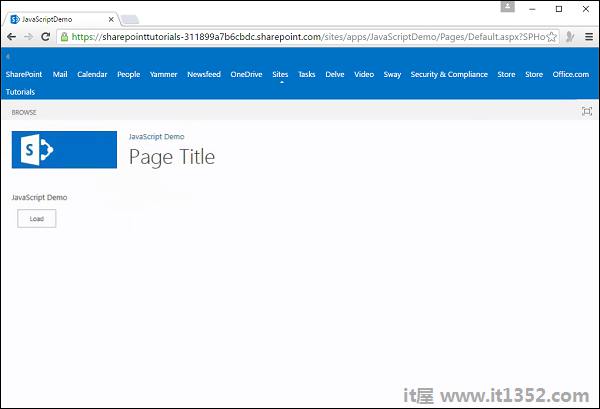
步骤3 : 创建项目后,让我们打开Default.aspx页面,该页面位于解决方案资源管理器中的Pages下,并添加一个按钮.
这是Default.aspx文件的完整实现.
<%-- The following 4 lines are ASP.NET directives needed when using SharePoint
   components --%>

<%@ Page Inherits = "Microsoft.SharePoint.WebPartPages.WebPartPage,
   Microsoft.SharePoint, Version = 15.0.0.0, Culture = neutral,
   PublicKeyToken = 71e9bce111e9429c" MasterPageFile = "~masterurl/default.master"
   Language = "C#" %>

<%@ Register TagPrefix = "Utilities" Namespace = "Microsoft.SharePoint.Utilities"
   Assembly = "Microsoft.SharePoint, Version = 15.0.0.0, Culture = neutral,
   PublicKeyToken = 71e9bce111e9429c" %>

<%@ Register TagPrefix = "WebPartPages"
   Namespace = "Microsoft.SharePoint.WebPartPages" Assembly = "Microsoft.SharePoint,
   Version = 15.0.0.0, Culture = neutral, PublicKeyToken = 71e9bce111e9429c" %>

<%@ Register TagPrefix = "SharePoint" Namespace = "Microsoft.SharePoint.WebControls"
   Assembly = "Microsoft.SharePoint, Version = 15.0.0.0, Culture = neutral,
   PublicKeyToken = 71e9bce111e9429c" %>

<%-- The markup and script in the following Content element will be placed in
   the <head> of the page --%>

<asp:Content ContentPlaceHolderID = "PlaceHolderAdditionalPageHead"
   runat = "server">
   <script type = "text/javascript" src = "../Scripts/jquery-1.9.1.min.js"></script>
   <SharePoint:ScriptLink name = "sp.js" runat = "server" OnDemand = "true"
      LoadAfterUI = "true" Localizable = "false" />
   <meta name = "WebPartPageExpansion" content = "full" />
   <!–Add your CSS styles to the following file ->
   <link rel = "Stylesheet" type = "text/css" href = "../Content/App.css" />
   <!–Add your JavaScript to the following file ->
   <script type = "text/javascript" src = "../Scripts/App.js"></script>
</asp:Content>

<%-- The markup in the following Content element will be placed in the TitleArea
   of the page --%>

<asp:Content ContentPlaceHolderID = "PlaceHolderPageTitleInTitleArea"
   runat = "server">
   Page Title
</asp:Content>

<%-- The markup and script in the following Content element will be placed in
   the <body> of the page --%>

<asp:Content ContentPlaceHolderID = "PlaceHolderMain" runat = "server">
   <div>
      <p id = "message">
         <!–The following content will be replaced with the user name when
            you run the app – see App.js -> initializing…
      </p>
      <input id = "loadButton" type  = "button" value = "Load" />
   </div>
</asp:Content>
第4步 : 打开App.js文件,该文件位于解决方案资源管理器中的脚本下,并用以下代码替换它.
JQuery(document).ready(function () {
   JQuery("#loadButton").click(usingLoad)
});

function usingLoad() {
   var context = SP.ClientContext.get_current();
   var web = context.get_web();
   context.load(web);
   context.executeQueryAsync(success, fail);

   function success() {
      var message = jQuery("#message");
      message.text(web.get_title());
      message.append("<br/>");
      message.append(lists.get_count());
   }
   function fail(sender, args) {
      alert("Call failed. Error: " + args.get_message());
   }
}
我们正在使用jQuery创建 document.ready 函数.在这里,我们只想将click事件处理程序附加到按钮.因此,我们使用选择器来获取 loadButton 然后我们使用加载添加了click事件处理程序.
所以当我们点击按钮时,我们想要在演示的托管版本中做同样的事情,我们想要显示网络标题.
第5步 : 发布您的应用程序,您将看到以下文件 :

第6步 : 将此文件拖到SharePoint网站应用页面.
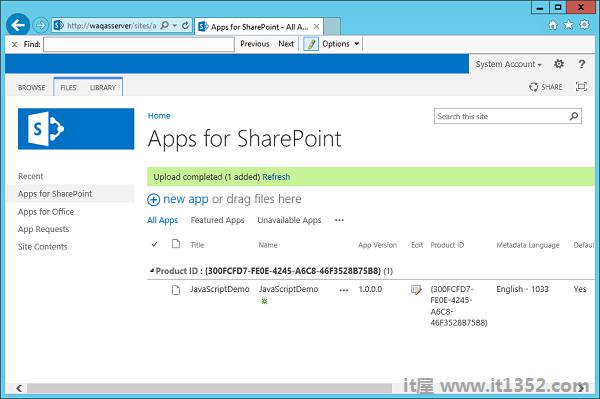
您将在列表中看到文件 JavaScriptDemo .

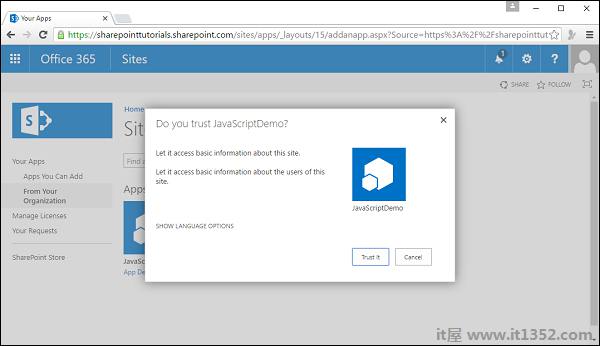
第7步 : 单击左窗格中的"站点内容",然后选择"添加应用程序".点击 JavaScriptDemo 图标.
![]()
第8步 : 点击信任它.
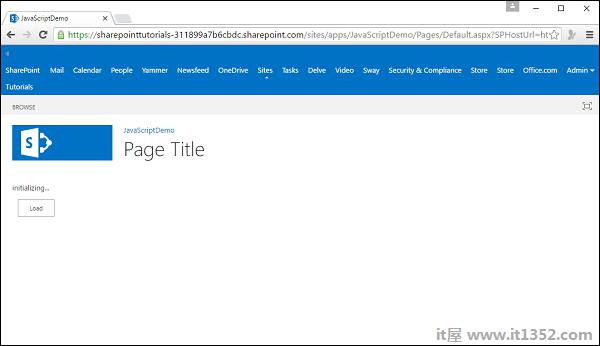
第9步 : 现在您将看到您的应用.点击应用图标.
![]()
步骤10 : 单击"加载"按钮时,它将更新文本.
您可以看到更新的文本.