在WPF中,交互显示视图如何与位于该视图中的控件交互.最常见的交互有两种类型 :
行为
拖放
Expression Blend 3引入了行为,它可以将一些功能封装到可重用的组件中.要添加其他行为,可以将这些组件附加到控件.行为为设计复杂的用户交互提供了更大的灵活性.
让我们看一个控件附加ControlStoryBoardAction行为的简单示例.
创建一个名为WPFBehavior的新WPF项目.
以下XAML代码创建一个椭圆和两个按钮来控制椭圆的移动.
<Window
xmlns = "http://schemas.microsoft.com/winfx/2006/xaml/presentation"
xmlns:x = "http://schemas.microsoft.com/winfx/2006/xaml"
xmlns:d = "http://schemas.microsoft.com/expression/blend/2008"
xmlns:mc = "http://schemas.openxmlformats.org/markup-compatibility/2006"
xmlns:local = "clr-namespace:WPFBehaviors"
xmlns:i = "http://schemas.microsoft.com/expression/2010/interactivity"
xmlns:ei = "http://schemas.microsoft.com/expression/2010/interactions"
x:Class = "WPFBehaviors.MainWindow"
mc:Ignorable = "d" Title = "MainWindow" Height = "350" Width = "604">
<Window.Resources>
<Storyboard x:Key = "Storyboard1" RepeatBehavior = "Forever" AutoReverse = "True">
<DoubleAnimationUsingKeyFrames Storyboard.TargetProperty =
"(UIElement.RenderTransform).(TransformGroup.Children )[3].(TranslateTransform.X)"
Storyboard.TargetName = "ellipse">
<EasingDoubleKeyFrame KeyTime = "0:0:1" Value = "301.524"/>
<EasingDoubleKeyFrame KeyTime = "0:0:2" Value = "2.909"/>
</DoubleAnimationUsingKeyFrames>
<DoubleAnimationUsingKeyFrames Storyboard.TargetProperty =
"(UIElement.RenderTransform).(TransformGroup.Children )[3].(TranslateTransform.Y)"
Storyboard.TargetName = "ellipse">
<EasingDoubleKeyFrame KeyTime = "0:0:1" Value = "-0.485"/>
<EasingDoubleKeyFrame KeyTime = "0:0:2" Value = "0"/>
</DoubleAnimationUsingKeyFrames>
<ObjectAnimationUsingKeyFrames Storyboard.TargetProperty = "(ContentControl.Content)"
Storyboard.TargetName = "button">
<DiscreteObjectKeyFrame KeyTime = "0" Value = "Play"/>
</ObjectAnimationUsingKeyFrames>
<ObjectAnimationUsingKeyFrames Storyboard.TargetProperty = "(ContentControl.Content)"
Storyboard.TargetName = "button1">
<DiscreteObjectKeyFrame KeyTime = "0" Value = "Stop"/>
<DiscreteObjectKeyFrame KeyTime = "0:0:2" Value = "Stop"/>
</ObjectAnimationUsingKeyFrames>
</Storyboard>
</Window.Resources>
<Window.Triggers>
<EventTrigger RoutedEvent = "FrameworkElement.Loaded">
<BeginStoryboard Storyboard = "{StaticResource Storyboard1}"/>
</EventTrigger>
</Window.Triggers>
<Grid>
<Ellipse x:Name = "ellipse" Fill = "#FFAAAAC5" HorizontalAlignment = "Left"
Height = "50.901" Margin = "49.324,70.922,0,0" Stroke = "Black"
VerticalAlignment = "Top" Width = "73.684" RenderTransformOrigin = "0.5,0.5">
<Ellipse.RenderTransform>
<TransformGroup>
<ScaleTransform/>
<SkewTransform/>
<RotateTransform/>
<TranslateTransform/>
</TransformGroup>
</Ellipse.RenderTransform>
</Ellipse>
<Button x:Name = "button" Content = "Play" HorizontalAlignment = "Left" Height = "24.238"
Margin = "63.867,0,0,92.953" VerticalAlignment = "Bottom" Width = "74.654">
<i:Interaction.Triggers>
<i:EventTrigger EventName = "Click">
<ei:ControlStoryboardAction Storyboard = "{StaticResource Storyboard1}"/>
</i:EventTrigger>
</i:Interaction.Triggers>
</Button>
<Button x:Name = "button1" Content = "Stop" HorizontalAlignment = "Left" Height = "24.239"
Margin = "160.82,0,0,93.922" VerticalAlignment = "Bottom" Width = "75.138">
<i:Interaction.Triggers>
<i:EventTrigger EventName = "Click">
<ei:ControlStoryboardAction ControlStoryboardOption = "Stop"
Storyboard = "{StaticResource Storyboard1}"/>
</i:EventTrigger>
</i:Interaction.Triggers>
</Button>
</Grid>
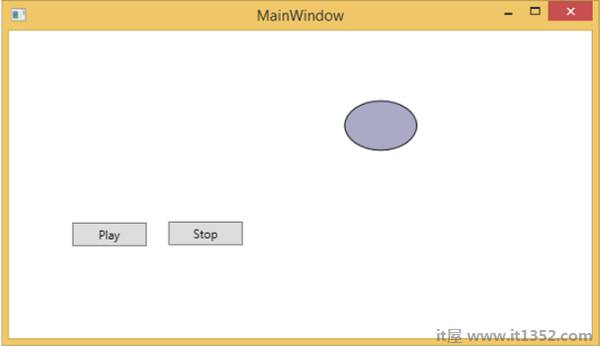
</Window>当您编译并执行上面的代码时,它将生成以下窗口,其中包含一个椭圆和两个按钮.
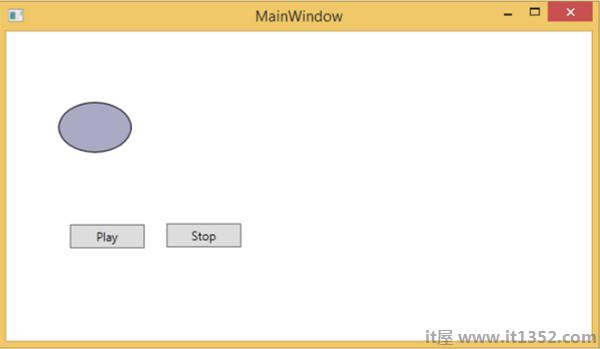
按下播放按钮时,它将从左向右开始,然后返回到原来的位置.停止按钮将停止椭圆运动.
在用户界面上拖放可以显着提高应用程序的效率和生产率.很少有应用程序使用拖放功能,因为人们认为很难实现.在某种程度上,很难处理拖放功能,但在WPF中,您可以非常轻松地处理它.
让我们举一个简单的例子来了解它是如何工作的.我们将创建一个应用程序,您可以将颜色从一个矩形拖放到另一个矩形.
创建一个新的WPF项目名称WPFDragAndDrop.
将五个矩形拖动到设计窗口并设置属性,如下面的XAML文件所示.
<Window x:Class = "WPFDragAndDrop.MainWindow"
   xmlns = "http://schemas.microsoft.com/winfx/2006/xaml/presentation"
   xmlns:x = "http://schemas.microsoft.com/winfx/2006/xaml"
   xmlns:d = "http://schemas.microsoft.com/expression/blend/2008"
   xmlns:mc = "http://schemas.openxmlformats.org/markup-compatibility/2006"
   xmlns:local = "clr-namespace:WPFDragAndDrop"
   mc:Ignorable = "d" Title = "MainWindow" Height = "402.551" Width = "604">

   <Grid>
      <Rectangle Name = "Target" Fill = "AliceBlue" HorizontalAlignment = "Left"
         Height = "345" Margin = "10,10,0,0" Stroke = "Black"
         VerticalAlignment = "Top" Width = "387" AllowDrop = "True" Drop = "Target_Drop"/>

      <Rectangle Fill = "Beige" HorizontalAlignment = "Left" Height = "65"
         Margin = "402,10,0,0" Stroke = "Black" VerticalAlignment = "Top"
         Width = "184" MouseLeftButtonDown = "Rect_MLButtonDown"/>

      <Rectangle Fill = "LightBlue" HorizontalAlignment = "Left" Height = "65"
         Margin = "402,80,0,0" Stroke = "Black" VerticalAlignment = "Top"
         Width = "184" MouseLeftButtonDown = "Rect_MLButtonDown"/>

      <Rectangle Fill = "LightCoral" HorizontalAlignment = "Left" Height = "65"
         Margin = "402,150,0,0" Stroke = "Black" VerticalAlignment = "Top"
         Width = "184" MouseLeftButtonDown = "Rect_MLButtonDown"/>

      <Rectangle Fill = "LightGray" HorizontalAlignment = "Left" Height = "65"
         Margin = "402,220,0,0" Stroke = "Black" VerticalAlignment = "Top"
         Width = "184" MouseLeftButtonDown = "Rect_MLButtonDown"/>

      <Rectangle Fill = "OliveDrab" HorizontalAlignment = "Left" Height = "65"
         Margin = "402,290,0,-7" Stroke = "Black" VerticalAlignment = "Top"
         Width = "184" MouseLeftButtonDown = "Rect_MLButtonDown"/>
   </Grid>

</Window>
第一个矩形是目标矩形,因此用户可以拖动颜色目标矩形的其他矩形.
下面给出了C#中用于拖放的事件实现.
<Window x:Class = "WPFDragAndDrop.MainWindow"
   xmlns = "http://schemas.microsoft.com/winfx/2006/xaml/presentation"
   xmlns:x = "http://schemas.microsoft.com/winfx/2006/xaml"
   xmlns:d = "http://schemas.microsoft.com/expression/blend/2008"
   xmlns:mc = "http://schemas.openxmlformats.org/markup-compatibility/2006"
   xmlns:local = "clr-namespace:WPFDragAndDrop"
   mc:Ignorable = "d" Title = "MainWindow" Height = "402.551" Width = "604">

   <Grid>
      <Rectangle Name = "Target" Fill = "AliceBlue" HorizontalAlignment = "Left"
         Height = "345" Margin = "10,10,0,0" Stroke = "Black"
         VerticalAlignment = "Top" Width = "387" AllowDrop = "True" Drop = "Target_Drop"/>

      <Rectangle Fill = "Beige" HorizontalAlignment = "Left" Height = "65"
         Margin = "402,10,0,0" Stroke = "Black" VerticalAlignment = "Top"
         Width = "184" MouseLeftButtonDown = "Rect_MLButtonDown"/>

      <Rectangle Fill = "LightBlue" HorizontalAlignment = "Left" Height = "65"
         Margin = "402,80,0,0" Stroke = "Black" VerticalAlignment = "Top"
         Width = "184" MouseLeftButtonDown = "Rect_MLButtonDown"/>

      <Rectangle Fill = "LightCoral" HorizontalAlignment = "Left" Height = "65"
         Margin = "402,150,0,0" Stroke = "Black" VerticalAlignment = "Top"
         Width = "184" MouseLeftButtonDown = "Rect_MLButtonDown"/>

      <Rectangle Fill = "LightGray" HorizontalAlignment = "Left" Height = "65"
         Margin = "402,220,0,0" Stroke = "Black" VerticalAlignment = "Top"
         Width = "184" MouseLeftButtonDown = "Rect_MLButtonDown"/>

      <Rectangle Fill = "OliveDrab" HorizontalAlignment = "Left" Height = "65"
         Margin = "402,290,0,-7" Stroke = "Black" VerticalAlignment = "Top"
         Width = "184" MouseLeftButtonDown = "Rect_MLButtonDown"/>
   </Grid>

</Window
}
当您运行应用程序时,它将生成以下窗口.
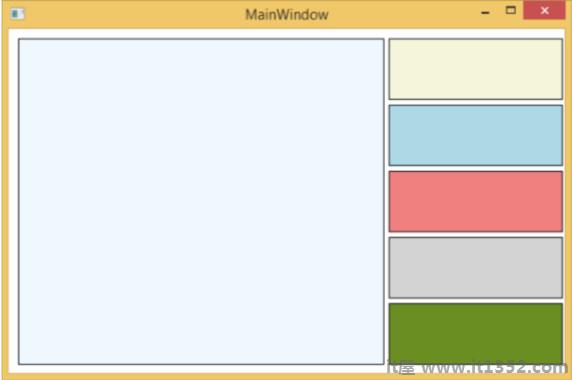
如果从右边的矩形中拖出一种颜色将它放在左边的大矩形上,你会立即看到它的效果.
让我们从右侧拖动一个 th 一个.
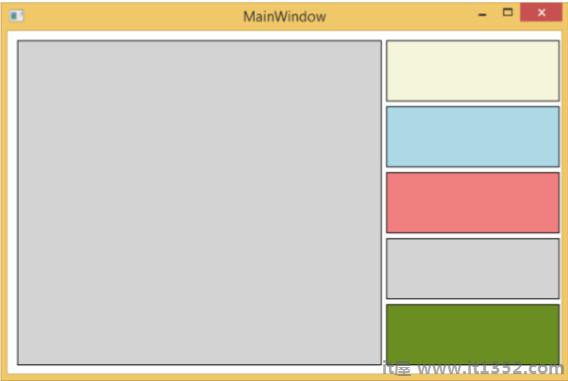
你可以看到目标的颜色矩形已经改变了.我们建议您执行上述代码并试验其功能.