数据绑定可从AngularJS,Angular 2获得,现在也可以在Angular 4中使用.我们使用花括号进行数据绑定 - {{}};这个过程叫做插值.我们在前面的例子中已经看到我们如何将值声明为变量标题,并且在浏览器中打印出相同的值.
app.component.html中的变量文件被称为{{title}},标题的值在 app.component.ts 文件和 app.component.html 中初始化,显示值.
现在让我们在浏览器中创建月份下拉列表.为此,我们在 app.component.ts 中创建了一个月数组,如下所示 :
import { Component } from '@angular/core';

@Component({
   selector: 'app-root',
   templateUrl: './app.component.html',
   styleUrls: ['./app.component.css']
})
export class AppComponent {
   title = 'Angular 4 Project!';
   // declared array of months.
   months = ["January", "Feburary", "March", "April", "May",
            "June", "July", "August", "September",
            "October", "November", "December"];
}
上面显示的月份数组将显示在浏览器的下拉列表中.为此,我们将使用以下代码行 :
<!--The content below is only a placeholder and can be replaced. -->
<div style="text-align:center">
   <h1>
      Welcome to {{title}}.
   </h1>
</div>

<div> Months :
   <select>
      <option *ngFor="let i of months">{{i}}</option>
   </select>
</div>
我们已经创建了带选项的普通选择标记.在选项中,我们使用了 for loop . for循环用于遍历月份数组,这反过来将创建具有月份中存在的值的选项标记.
语法
这两个大括号有助于数据绑定.您在 app.component.ts 文件中声明变量,并使用大括号替换相同的文件.
让我们看看上个月的输出浏览器中的数组

变量在 app.component.ts中设置可以使用大括号与 app.component.html 绑定;例如, {{}} .
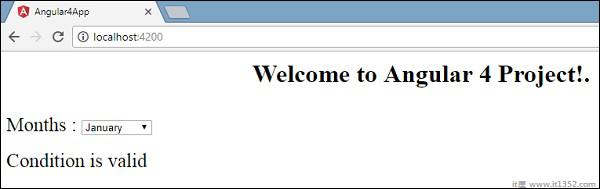
现在让我们根据条件在浏览器中显示数据.在这里,我们添加了一个变量并将值赋值为true.使用if语句,我们可以隐藏/显示要显示的内容.
import { Component } from '@angular/core';

@Component({
   selector: 'app-root',
   templateUrl: './app.component.html',
   styleUrls: ['./app.component.css']
})

export class AppComponent {
   title = 'Angular 4 Project!';
   //array of months.
   months = ["January", "February", "March", "April",
            "May", "June", "July", "August", "September",
            "October", "November", "December"];
   isavailable = true;   //variable is set to true
}
<!--The content below is only a placeholder and can be replaced.-->
<div style = "text-align:center">
<h1>
Welcome to {{title}}.
</h1>
</div>
<div> Months :
<select>
<option *ngFor = "let i of months">{{i}}</option>
</select>
</div>
<br/>
<div>
<span *ngIf = "isavailable">Condition is valid.</span>
//over here based on if condition the text condition is valid is displayed.
If the value of isavailable is set to false it will not display the text.
</div>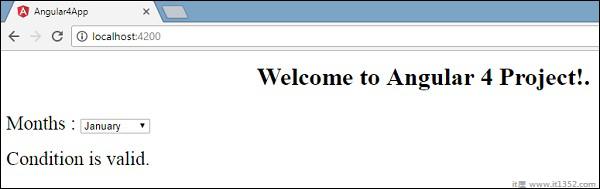
让我们使用 IF THEN ELSE 条件尝试上面的例子.
import { Component } from '@angular/core';
@Component({
selector: 'app-root',
templateUrl: './app.component.html',
styleUrls: ['./app.component.css']
})
export class AppComponent {
title = 'Angular 4 Project!';
//array of months.
months = ["January", "February", "March", "April",
"May", "June", "July", "August", "September",
"October", "November", "December"];
isavailable = false;
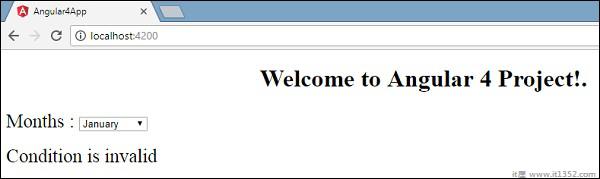
}在这种情况下,我们将 isavailable 变量设为false.要打印 else 条件,我们必须创建 ng-template ,如下所示 :
<ng-template #condition1>Condition is invalid</ng-template>
完整代码如下所示;
<!--The content below is only a placeholder and can be replaced.-->
<div style="text-align:center">
   <h1>
      Welcome to {{title}}.
   </h1>
</div>

<div> Months :
   <select>
      <option *ngFor="let i of months">{{i}}</option>
   </select>
</div>
<br/>

<div>
   <span *ngIf="isavailable; else condition1">Condition is valid.</span>
   <ng-template #condition1>Condition is invalid</ng-template>
</div>如果与else条件一起使用,并且使用的变量是 condition1 .同样被指定为 id ng-template ,当可用变量设置为false时,显示文本条件无效 .
以下屏幕截图显示了浏览器中的显示.
现在让我们使用 if then else 条件.
import { Component } from '@angular/core';

@Component({
   selector: 'app-root',
   templateUrl: './app.component.html',
   styleUrls: ['./app.component.css']
})

export class AppComponent {
   title = 'Angular 4 Project!';
   //array of months.
   months = ["January", "February", "March", "April",
            "May", "June", "July", "August", "September",
            "October", "November", "December"];
   isavailable = true;
}
现在,我们将变量 isavailable 设为true.在html中,条件以下列方式写入 :
<!--The content below is only a placeholder and can be replaced.-->
<div style="text-align:center">
   <h1>
   Welcome to {{title}}.
   </h1>
</div>

<div> Months :
   <select>
      <option *ngFor="let i of months">{{i}}</option>
   </select>
</div>
<br/>

<div>
   <span *ngIf="isavailable; then condition1 else condition2">Condition is valid.</span>
   <ng-template #condition1>Condition is valid</ng-template>
   <ng-template #condition2>Condition is invalid</ng-template>
</div>
如果变量为真,则 condition1 ,否则 condition2 .现在,使用id #condition1 和#condition2 创建两个模板.
浏览器中的显示如下 :