JSF为开发人员提供了强大的功能来定义他们自己的自定义组件,可用于呈现自定义内容.
在JSF中定义自定义组件需要两个步骤.
| Step | 描述 |
|---|---|
| 1a | 创建资源文件夹. 在具有复合命名空间的resources文件夹中创建一个xhtml文件. |
| 1b | 使用复合标签 composite:interface,composite:attribute 和 composite:实现,定义复合组件的内容.在 composite:implementation 中使用 cc.attrs 来使用 composite:interface 中的 composite:attribute 来定义变量. |
在资源文件夹中创建一个it1352文件夹,并在其中创建一个文件loginComponent.xhtml.
在html标题中使用复合命名空间.
<html xmlns = "http://www.w3.org/1999/xhtml"
   xmlns:h = "http://java.sun.com/jsf/html"
   xmlns:f = "http://java.sun.com/jsf/core"
   xmlns:composite = "http://java.sun.com/jsf/composite">
...
</html>
下表描述了复合标签的使用.
| S.No | 标签&描述 |
|---|---|
| 1 | composite:interface 声明可在复合中使用的可配置值:implementation. |
| 2 | composite:attribute 使用此标记声明配置值. |
| 3 | composite:implementation 声明JSF组件.可以使用#{cc.attrs.attribute-name}表达式访问composite:interface中定义的可配置值. |
<composite:interface>
   <composite:attribute name = "usernameLabel" />
   <composite:attribute name = "usernameValue" />
</composite:interface>

<composite:implementation>
<h:form>
   #{cc.attrs.usernameLabel} :
   <h:inputText id = "username" value = "#{cc.attrs.usernameValue}" />
</h:form>在JSF中使用自定义组件是一个简单的过程.
| Step | 描述 |
|---|---|
| 2a | 创建一个xhtml文件并使用自定义组件的命名空间.命名空间将是 http://java.sun.com/jsf/<folder-name>其中folder-name是包含自定义组件的资源目录中的文件夹 |
| 2b | 使用自定义组件作为普通JSF标签 |
<html xmlns = "http://www.w3.org/1999/xhtml"
   xmlns:h = "http://java.sun.com/jsf/html"
   xmlns:ui = "http://java.sun.com/jsf/facelets">
   xmlns:tp = "http://java.sun.com/jsf/composite/it1352">
<h:form>
   <tp:loginComponent
      usernameLabel = "Enter User Name: "
      usernameValue = "#{userData.name}" />
</h:form>让我们创建一个测试JSF应用程序来测试JSF中的自定义组件.
| Step | 描述 |
|---|---|
| 1 | 在包 com.it1352.test 下创建一个名为 helloworld 的项目,如 JSF - First Application 章. |
| 2 | 在 src → 下创建 resources 文件夹;主文件夹. |
| 3 | 在 src&rarr下创建 it1352文件夹;主要 → 资源文件夹. |
| 4 | 在 src → 下创建 loginComponent.xhtml 文件;主要 → 资源 → it1352文件夹. |
| 5 | 修改 UserData.java 文件,如下所述. |
| 6 | 修改 home.xhtml ,如下所述.保持其余文件不变. |
| 7 | 编译并运行应用程序以确保业务逻辑按照要求运行. |
| 8 | 最后,以war文件的形式构建应用程序并将其部署在Apache中Tomcat Webserver. |
| 9 | 使用适当的URL启动您的Web应用程序,如下面最后一步所述. |
<?xml version = "1.0" encoding = "UTF-8"?>
<!DOCTYPE html PUBLIC "-//W3C//DTD XHTML 1.0 Transitional//EN"
"http://www.w3.org/TR/xhtml1/DTD/xhtml1-transitional.dtd">

<html xmlns = "http://www.w3.org/1999/xhtml"
   xmlns:h = "http://java.sun.com/jsf/html"
   xmlns:f = "http://java.sun.com/jsf/core"
   xmlns:composite = "http://java.sun.com/jsf/composite">

   <composite:interface>
      <composite:attribute name = "usernameLabel" />
      <composite:attribute name = "usernameValue" />
      <composite:attribute name = "passwordLabel" />
      <composite:attribute name = "passwordValue" />
      <composite:attribute name = "loginButtonLabel" />
      <composite:attribute name = "loginButtonAction"
         method-signature = "java.lang.String login()" />
   </composite:interface>

   <composite:implementation>
      <h:form>
         <h:message for = "loginPanel" style = "color:red;" />

         <h:panelGrid columns = "2" id = "loginPanel">
            #{cc.attrs.usernameLabel} :
            <h:inputText id = "username" value = "#{cc.attrs.usernameValue}" />
            #{cc.attrs.passwordLabel} :
            <h:inputSecret id = "password" value = "#{cc.attrs.passwordValue}" />
         </h:panelGrid>

         <h:commandButton action = "#{cc.attrs.loginButtonAction}"
            value = "#{cc.attrs.loginButtonLabel}"/>
      </h:form>
   </composite:implementation>
</html>package com.it1352.test;
import java.io.Serializable;
import javax.faces.bean.ManagedBean;
import javax.faces.bean.SessionScoped;
@ManagedBean(name = "userData", eager = true)
@SessionScoped
public class UserData implements Serializable {
private static final long serialVersionUID = 1L;
private String name;
private String password;
public String getName() {
return name;
}
public void setName(String name) {
this.name = name;
}
public String getPassword() {
return password;
}
public void setPassword(String password) {
this.password = password;
}
public String login() {
return "result";
}
}<?xml version = "1.0" encoding = "UTF-8"?>
<!DOCTYPE html PUBLIC "-//W3C//DTD XHTML 1.0 Transitional//EN"
"http://www.w3.org/TR/xhtml1/DTD/xhtml1-transitional.dtd">
<html xmlns = "http://www.w3.org/1999/xhtml"
xmlns:h = "http://java.sun.com/jsf/html"
xmlns:f = "http://java.sun.com/jsf/core"
xmlns:tp = "http://java.sun.com/jsf/composite/it1352">
<h:head>
<title>JSF tutorial</title>
</h:head>
<h:body>
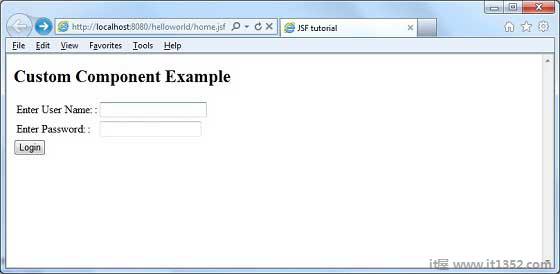
<h2>Custom Component Example</h2>
<h:form>
<tp:loginComponent
usernameLabel = "Enter User Name: "
usernameValue = "#{userData.name}"
passwordLabel = "Enter Password: "
passwordValue = "#{userData.password}"
loginButtonLabel = "Login"
loginButtonAction = "#{userData.login}" />
</h:form>
</h:body>
</html>完成所有更改后,让我们编译并运行应用程序,就像我们在JSF - First Application章节中所做的那样.如果你的应用程序一切正常,这将产生以下结果.