国际化是一种技术,其中状态消息,GUI组件标签,货币,日期在程序中不是硬编码的.相反,它们存储在资源包中的源代码之外并动态检索. JSF提供了一种处理资源包的非常方便的方法.
需要以下步骤来内化JSF应用程序.
为每个区域设置创建属性文件.名称应为< file-name> _< locale> .properties格式.
默认语言环境可以在文件名中省略.
greeting = Hello World!
greeting = Bonjour tout le monde!
<application>
   <locale-config>
      <default-locale>en</default-locale>
      <supported-locale>fr</supported-locale>
   </locale-config>

   <resource-bundle>
      <base-name>com.it1352.messages</base-name>
      <var>msg</var>
   </resource-bundle>
</application>
<h:outputText value = "#{msg['greeting']}" />让我们创建一个测试JSF应用程序来测试JSF中的国际化.
| Step | 描述 |
|---|---|
| 1 | 在 com.it1352.test 下创建一个名为 helloworld 的项目,如 |
| 2 | 在 src → 下创建资源文件夹; mai 文件夹. |
| 3 | 在 src&rarr下创建 com 文件夹;主要 → 资源文件夹. |
| 4 | 在 src&rarr下创建 it1352文件夹;主要 → 资源 → com 文件夹. |
| 5 | 在 src → 下创建 messages.properties 文件;主要 → 资源 → com → it1352文件夹.修改它,如下所述. |
| 6 | 在 src → 下创建 messages_fr.properties 文件;主要 → 资源 → com → it1352文件夹.修改它,如下所述. |
| 7 | 在 WEB-INFf 中创建 faces-config.xml ,如下所述. |
| 8 | 创建 UserData.java 包 com.it1352.test ,如下所述. |
| 9 | 修改 home.xhtml ,如下所述.保持其余文件不变. |
| 10 | 编译并运行应用程序以确保业务逻辑按照要求运行. |
| 11 | 最后,以war文件的形式构建应用程序并将其部署在Apache中Tomcat Webserver. |
| 12 | 使用适当的URL启动您的Web应用程序,如下面最后一步所述. |
greeting = Hello World!
greeting = Bonjour tout le monde!
<?xml version = "1.0" encoding = "UTF-8"?>
<faces-config
   xmlns = "http://java.sun.com/xml/ns/javaee"
   xmlns:xsi = "http://www.w3.org/2001/XMLSchema-instance"
   xsi:schemaLocation = "http://java.sun.com/xml/ns/javaee
   http://java.sun.com/xml/ns/javaee/web-facesconfig_2_0.xsd"
   version = "2.0">

   <application>
      <locale-config>
         <default-locale>en</default-locale>
         <supported-locale>fr</supported-locale>
      </locale-config>

      <resource-bundle>
         <base-name>com.IT屋.messages</base-name>
         <var>msg</var>
      </resource-bundle>
   </application>
</faces-config>
package com.it1352.test;
import java.io.Serializable;
import java.util.LinkedHashMap;
import java.util.Locale;
import java.util.Map;

import javax.faces.bean.ManagedBean;
import javax.faces.bean.SessionScoped;
import javax.faces.context.FacesContext;
import javax.faces.event.ValueChangeEvent;

@ManagedBean(name = "userData", eager = true)
@SessionScoped
public class UserData implements Serializable {
   private static final long serialVersionUID = 1L;
   private String locale;

   private static Map<String,Object> countries;
      static {

      countries = new LinkedHashMap<String,Object>();
      countries.put("English", Locale.ENGLISH);
      countries.put("French", Locale.FRENCH);
   }

   public Map<String, Object> getCountries() {
      return countries;
   }

   public String getLocale() {
      return locale;
   }

   public void setLocale(String locale) {
      this.locale = locale;
   }

   //value change event listener
   public void localeChanged(ValueChangeEvent e) {
      String newLocaleValue = e.getNewValue().toString();

      for (Map.Entry<String, Object> entry : countries.entrySet()) {

         if(entry.getValue().toString().equals(newLocaleValue)) {
            FacesContext.getCurrentInstance()
               .getViewRoot().setLocale((Locale)entry.getValue());
         }
      }
   }
}<?xml version = "1.0" encoding = "UTF-8"?>
<!DOCTYPE html PUBLIC "-//W3C//DTD XHTML 1.0 Transitional//EN"
"http://www.w3.org/TR/xhtml1/DTD/xhtml1-transitional.dtd">
<html xmlns = "http://www.w3.org/1999/xhtml"
xmlns:h = "http://java.sun.com/jsf/html"
xmlns:f = "http://java.sun.com/jsf/core">
<h:head>
<title>JSF tutorial</title>
</h:head>
<h:body>
<h2>Internalization Language Example</h2>
<h:form>
<h3><h:outputText value = "#{msg['greeting']}" /></h3>
<h:panelGrid columns = "2">
Language :
<h:selectOneMenu value = "#{userData.locale}" onchange = "submit()"
valueChangeListener = "#{userData.localeChanged}">
<f:selectItems value = "#{userData.countries}" />
</h:selectOneMenu>
</h:panelGrid>
</h:form>
</h:body>
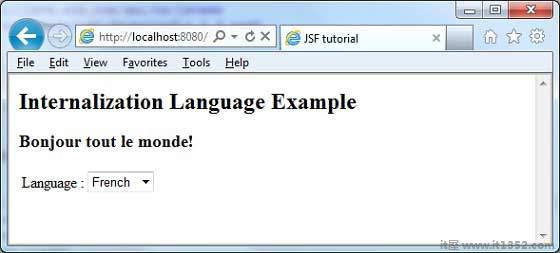
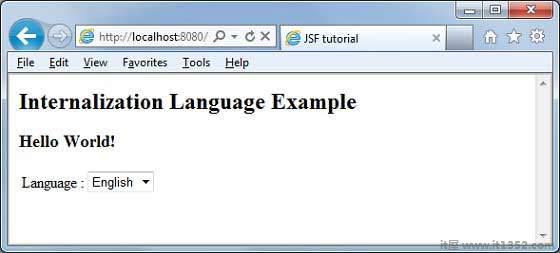
</html>完成所有更改后,让我们编译并运行应用程序,就像我们在JSF - First Application章节中所做的那样.如果您的应用程序一切正常,这将产生以下结果.
从下拉列表中更改语言.您将看到以下输出.