Spring提供了特殊的类DelegatingVariableResolver,以无缝方式将JSF和Spring集成在一起.
需要以下步骤在JSF中集成Spring依赖注入(IOC)功能.
在faces-config.xml中添加一个变量解析器条目以指向spring class DelegatingVariableResolver ./p>
<faces-config>
   <application>
   <variable-resolver>
      org.springframework.web.jsf.DelegatingVariableResolver
   </variable-resolver>
   ...
</faces-config>
添加 ContextLoaderListener 和 RequestContextListener 在web.xml中由spring框架提供的监听器.
<web-app>
   ...
   <!-- Add Support for Spring -->
   <listener>
      <listener-class>
         org.springframework.web.context.ContextLoaderListener
      </listener-class>
   </listener>

   <listener>
      <listener-class>
         org.springframework.web.context.request.RequestContextListener
      </listener-class>
   </listener>
   ...
</web-app>
在applicationContext.xml中定义bean,它将用作依赖关系托管bean.
<beans>
   <bean id = "messageService"
      class = "com.it1352.test.MessageServiceImpl">
      <property name = "message" value = "Hello World!" />
   </bean>
</beans>
DelegatingVariableResolver 首先将值查找委托给默认的解析器的JSF,然后是Spring的WebApplicationContext.这允许人们轻松地将基于spring的依赖注入到一个JSF管理的bean中.
我们在这里注入了messageService作为基于spring的依赖.
<faces-config>
   ...
   <managed-bean>
      <managed-bean-name>userData</managed-bean-name>
      <managed-bean-class>com.IT屋.test.UserData</managed-bean-class>
      <managed-bean-scope>request</managed-bean-scope>

      <managed-property>
         <property-name>messageService</property-name>
         <value>#{messageService}</value>
      </managed-property>
   </managed-bean>
</faces-config>//jsf managed bean
public class UserData {
//spring managed dependency
private MessageService messageService;
public void setMessageService(MessageService messageService) {
this.messageService = messageService;
}
public String getGreetingMessage() {
return messageService.getGreetingMessage();
}
}让我们创建一个测试JSF应用程序来测试spring整合.
| Step | 描述 |
|---|---|
| 1 | 在包 com.it1352.test <下创建一个名为 helloworld 的项目/i>如 JSF - First Application 章节中所述. |
| 2 | 修改 pom.xml ,如下所述. |
| 3 | 创建 faces-config WEB-INF 文件夹中的.xml ,如下所述. |
| 4 | 修改 web.xml ,如下所述. |
| 5 | 创建 applicationContext.xml 在 WEB-INF 文件夹中,如下所述. |
| 6 | 在包 com.it1352.test下创建 MessageService.java 如下所述. |
| 7 | 在包 com.it1352.test 下创建 MessageServiceImpl.java ,如下所述. |
| 8 | 创建包 com.it1352.test 下的UserData.java ,如下所述. |
| 9 | 修改 home.xhtml ,如下所述.保持其余文件不变. |
| 10 | 编译并运行应用程序以确保业务逻辑按照要求运行. |
| 11 | 最后,以war文件的形式构建应用程序并将其部署在Apache中Tomcat Webserver. |
| 12 | 使用适当的URL启动您的Web应用程序,如下面最后一步所述. |
<project xmlns = "http://maven.apache.org/POM/4.0.0"
   xmlns:xsi = "http://www.w3.org/2001/XMLSchema-instance"
   xsi:schemaLocation = "http://maven.apache.org/POM/4.0.0
   http://maven.apache.org/maven-v4_0_0.xsd">

   <modelVersion>4.0.0</modelVersion>
   <groupId>com.IT屋.test</groupId>
   <artifactId>helloworld</artifactId>
   <packaging>war</packaging>
   <version>1.0-SNAPSHOT</version>
   <name>helloworld Maven Webapp</name>
   <url>http://maven.apache.org</url>

   <dependencies>
      <dependency>
         <groupId>junit</groupId>
         <artifactId>junit</artifactId>
         <version>3.8.1</version>
         <scope>test</scope>
      </dependency>

      <dependency>
         <groupId>com.sun.faces</groupId>
         <artifactId>jsf-api</artifactId>
         <version>2.1.7</version>
      </dependency>

      <dependency>
         <groupId>com.sun.faces</groupId>
         <artifactId>jsf-impl</artifactId>
         <version>2.1.7</version>
      </dependency>

      <dependency>
         <groupId>javax.servlet</groupId>
         <artifactId>jstl</artifactId>
         <version>1.2</version>
      </dependency>

      <dependency>
         <groupId>org.springframework</groupId>
         <artifactId>spring-core</artifactId>
         <version>3.1.2.RELEASE</version>
      </dependency>

      <dependency>
         <groupId>org.springframework</groupId>
         <artifactId>spring-web</artifactId>
         <version>3.1.2.RELEASE</version>
      </dependency>
   </dependencies>

   <build>
      <finalName>helloworld</finalName>
      <plugins>
         <plugin>
            <groupId>org.apache.maven.plugins</groupId>
            <artifactId>maven-compiler-plugin</artifactId>
            <version>2.3.1</version>
            <configuration>
               <source>1.6</source>
               <target>1.6</target>
            </configuration>
         </plugin>

         <plugin>
            <artifactId>maven-resources-plugin</artifactId>
            <version>2.6</version>

            <executions>
               <execution>
                  <id>copy-resources</id>
                  <phase>validate</phase>
                  <goals>
                     <goal>copy-resources</goal>
                  </goals>

                  <configuration>
                     <outputDirectory>${basedir}/target/helloworld/resources
                        </outputDirectory>
                     <resources>
                        <resource>
                           <directory>src/main/resources</directory>
                           <filtering>true</filtering>
                        </resource>
                     </resources>
                  </configuration>
               </execution>
            </executions>

         </plugin>
      </plugins>
   </build>
</project><?xml version = "1.0" encoding = "UTF-8"?>
<faces-config
xmlns = "http://java.sun.com/xml/ns/javaee"
xmlns:xsi = "http://www.w3.org/2001/XMLSchema-instance"
xsi:schemaLocation = "http://java.sun.com/xml/ns/javaee
http://java.sun.com/xml/ns/javaee/web-facesconfig_2_0.xsd"
version = "2.0">
<application>
<variable-resolver>
org.springframework.web.jsf.DelegatingVariableResolver
</variable-resolver>
</application>
<managed-bean>
<managed-bean-name>userData</managed-bean-name>
<managed-bean-class>com.IT屋.test.UserData</managed-bean-class>
<managed-bean-scope>request</managed-bean-scope>
<managed-property>
<property-name>messageService</property-name>
<value>#{messageService}</value>
</managed-property>
</managed-bean>
</faces-config><!DOCTYPE web-app PUBLIC "-//Sun Microsystems, Inc.//DTD Web Application 2.3//EN" "http://java.sun.com/dtd/web-app_2_3.dtd" > <web-app> <display-name>Archetype Created Web Application</display-name> <context-param> <param-name>javax.faces.PROJECT_STAGE</param-name> <param-value>Development</param-value> </context-param> <!-- Add Support for Spring --> <listener> <listener-class> org.springframework.web.context.ContextLoaderListener </listener-class> </listener> <listener> <listener-class> org.springframework.web.context.request.RequestContextListener </listener-class> </listener> <servlet> <servlet-name>Faces Servlet</servlet-name> <servlet-class>javax.faces.webapp.FacesServlet</servlet-class> </servlet> <servlet-mapping> <servlet-name>Faces Servlet</servlet-name> <url-pattern>*.jsf</url-pattern> </servlet-mapping> </web-app>
<?xml version = "1.0" encoding = "UTF-8"?>
<!DOCTYPE beans PUBLIC "-//SPRING//DTD BEAN 2.0//EN"
   "http://www.springframework.org/dtd/spring-beans-2.0.dtd">

<beans>
   <bean id = "messageService"
      class = "com.IT屋.test.MessageServiceImpl">
      <property name = "message" value = "Hello World!" />
   </bean>
</beans>
package com.it1352.test;
public interface MessageService {
   String getGreetingMessage();
}package com.it1352.test;
public class MessageServiceImpl implements MessageService {
private String message;
public String getGreetingMessage() {
return message;
}
public String getMessage() {
return message;
}
public void setMessage(String message) {
this.message = message;
}
}package com.it1352.test;
import java.io.Serializable;
public class UserData implements Serializable {
private static final long serialVersionUID = 1L;
private MessageService messageService;
public MessageService getMessageService() {
return messageService;
}
public void setMessageService(MessageService messageService) {
this.messageService = messageService;
}
public String getGreetingMessage() {
return messageService.getGreetingMessage();
}
}<?xml version = "1.0" encoding = "UTF-8"?>
<!DOCTYPE html PUBLIC "-//W3C//DTD XHTML 1.0 Transitional//EN"
"http://www.w3.org/TR/xhtml1/DTD/xhtml1-transitional.dtd">
<html xmlns = "http://www.w3.org/1999/xhtml"
xmlns:f = "http://java.sun.com/jsf/core"
xmlns:h = "http://java.sun.com/jsf/html">
<h:head>
<title>JSF Tutorial!</title>
</h:head>
<h:body>
<h2>Spring Integration Example</h2>
#{userData.greetingMessage}
</h:body>
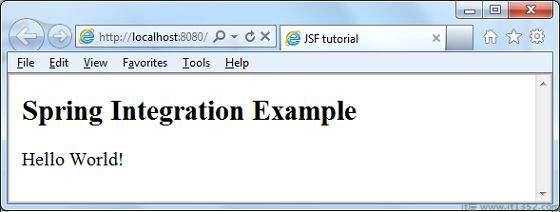
</html>完成所有更改后,让我们编译并运行应用程序,就像我们在JSF - First Application章节中所做的那样.如果您的应用程序一切正常,这将产生以下结果.