我们已经看到了组件及其用法.例如,我们有一个需要在整个项目中重用的内容.我们可以将它转换为一个组件并使用它.
让我们看一个简单组件的示例,看看渲染函数必须在其中做什么.
<html>
   <head>
      <title>VueJs Instance</title>
      <script type = "text/javascript" src = "js/vue.js"></script>
   </head>
   <body>
      <div id = "component_test">
         <testcomponent></testcomponent>
      </div>
      <script type = "text/javascript">
         Vue.component('testcomponent',{
            template : '<h1>Hello World</h1>',
            data: function() {
            },
            methods:{
            }
         });
         var vm = new Vue({
            el: '#component_test'
         });
      </script>
   </body>
</html>
考虑上面打印Hello World的简单组件示例,如下面的屏幕截图所示.
现在,如果我们想重用组件,我们可以通过再次打印来实现.例如,
<div id = "component_test">
   <testcomponent></testcomponent>
   <testcomponent></testcomponent>
   <testcomponent></testcomponent>
   <testcomponent></testcomponent>
</div>
输出如下.
但是,现在我们需要对组件进行一些更改.我们不希望打印相同的文本.我们怎样才能改变它?如果我们在组件内部键入内容,是否会考虑它?
让我们考虑以下示例,看看会发生什么.
<div id = "component_test">
   <testcomponent>Hello Jai</testcomponent>
   <testcomponent>Hello Roy</testcomponent>
   <testcomponent>Hello Ria</testcomponent>
   <testcomponent>Hello Ben</testcomponent>
</div>
输出与我们之前看到的相同.它不会改变我们想要的文本.

组件确实提供了一种称为插槽的东西.让我们使用它,看看我们是否得到了预期的结果.
<html>
   <head>
      <title>VueJs Instance</title>
      <script type = "text/javascript" src = "js/vue.js"></script>
   </head>
   <body>
      <div id = "component_test">
         <testcomponent>Hello Jai</testcomponent>
         <testcomponent>Hello Roy</testcomponent>
         <testcomponent>Hello Ria</testcomponent>
         <testcomponent>Hello Ben</testcomponent>
      </div>
      <script type = "text/javascript">
         Vue.component('testcomponent',{
            template : '<h1><slot></slot></h1>',
            data: function() {
            },
            methods:{
            }
         });
         var vm = new Vue({
            el: '#component_test'
         });
      </script>
   </body>
</html>
如上面的代码所示,在模板中我们添加了插槽,因此现在它需要在组件内部发送值,如下面的屏幕截图所示.
现在,让我们考虑一下我们要改变颜色和大小.例如,目前我们使用的是h1标签,我们希望将HTML标签更改为同一组件的p标签或div标签.我们如何才能灵活地进行如此多的更改?
我们可以在渲染功能的帮助下完成.渲染函数有助于使组件动态化并使用它所需的方式,使其保持通用并帮助使用相同的组件传递参数.
<html>
   <head>
      <title>VueJs Instance</title>
      <script type = "text/javascript" src = "js/vue.js"></script>
   </head>
   <body>
      <div id = "component_test">
         <testcomponent :elementtype = "'div,red,25,div1'">Hello Jai</testcomponent>
         <testcomponent :elementtype = "'h3,green,25,h3tag'">Hello Roy</testcomponent>
         <testcomponent :elementtype = "'p,blue,25,ptag'">Hello Ria</testcomponent>
         <testcomponent :elementtype = "'div,green,25,divtag'">Hello Ben</testcomponent>
      </div>
      <script type = "text/javascript">
         Vue.component('testcomponent',{
            render :function(createElement){
               var a = this.elementtype.split(",");
               return createElement(a[0],{
                  attrs:{
                     id:a[3],
                     style:"color:"+a[1]+";font-size:"+a[2]+";"
                  }
               },
               this.$slots.default
               )
            },
            props:{
               elementtype:{
                  attributes:String,
                  required:true
               }
            }
         });
         var vm = new Vue({
            el: '#component_test'
         });
      </script>
   </body>
</html>
在上面的代码中,我们使用以下代码更改了组件并使用props属性添加了render函数.
Vue.component('testcomponent',{
   render :function(createElement){
      var a = this.elementtype.split(",");
      return createElement(a[0],{
         attrs:{
            id:a[3],
            style:"color:"+a[1]+";font-size:"+a[2]+";"
         }
      },
      this.$slots.default
      )
   },
   props:{
      elementtype:{
         attributes:String,
         required:true
      }
   }
});
道具如下所示.
props:{
   elementtype:{
      attributes:String,
      required:true
   }
}
我们定义了一个名为elementtype的属性,它接受string类型的属性字段.另一个必填字段,提到该字段是必填字段.
在渲染函数中,我们使用了elementtype属性,如下面的代码片段所示.
render :function(createElement){
   var a = this.elementtype.split(",");
   return createElement(a[0],{
      attrs:{
         id:a[3],
         style:"color:"+a[1]+";font-size:"+a[2]+";"
      }
   },
   this.$slots.default
   )
}
渲染函数将createElement作为参数并返回相同的值. CreateElement以与JavaScript相同的方式创建DOM元素.我们还使用attrs字段中的值在逗号上拆分元素类型.
CreateElement将第一个参数作为要创建的元素标签.它使用以下代码传递给组件.
<testcomponent :elementtype = "'div,red,25,div1'">Hello Jai</testcomponent>
组件需要获取props字段,如上所示.它以:和道具的名称开头.这里,我们传递元素标签,颜色,fontsize和元素的id.
在渲染函数中,在createElement中,我们在逗号上拆分,所以第一个元素是elementtag,赋予createElemet,如下面的代码所示.
return createElement(
   a[0],{
      attrs:{
         id:a[3],
         style:"color:"+a[1]+";font-size:"+a[2]+";"
      }
   },
   this.$slots.default
)
a [0 ] 是html元素标记.下一个参数是元素标记的属性.它们在以下代码段中的attr字段中定义.
attrs:{
   id:a[3],
   style:"color:"+a[1]+";font-size:"+a[2]+";"
}
我们为元素标签定义了两个属性 - id 和样式 .对于id,我们传递一个[3],这是我在分割逗号后得到的值.使用样式,我们定义了颜色和字体大小.
最后是插槽,这是我们在以下代码中的组件中给出的消息.
<testcomponent :elementtype = "'div,red,25,div1'">Hello Jai</testcomponent>
我们使用以下代码定义了要在createElement中打印的文本.
this.$slots.default
它采用组件字段中的默认值.
以下是我们在浏览器中获得的输出.
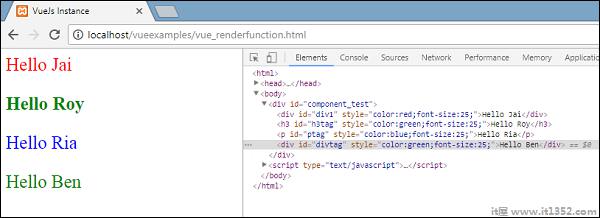
元素也显示结构.这些是我们定义的组件 :
<div id = "component_test">
   <testcomponent :elementtype = "'div,red,25,div1'">Hello Jai</testcomponent>
   <testcomponent :elementtype = "'h3,green,25,h3tag'">Hello Roy</testcomponent>
   <testcomponent :elementtype = "'p,blue,25,ptag'">Hello Ria</testcomponent>
   <testcomponent :elementtype = "'div,green,25,divtag'">Hello Ben</testcomponent>
</div>