由于GWT的功能在于用Java编写,在JavaScript中运行,我们将使用Java IDE Eclipse来演示我们的示例.
让我们开始吧使用简单的 HelloWorld 应用程序 :
第一步是创建一个简单的Web使用Eclipse IDE的应用程序项目.使用选项 Google Icon ![]() >启动项目向导新的Web应用程序项目...... .现在使用向导窗口将项目命名为 HelloWorld ,如下所示 :
>启动项目向导新的Web应用程序项目...... .现在使用向导窗口将项目命名为 HelloWorld ,如下所示 :

取消选择使用Google App Engine ,因为我们未在此项目中使用它并保留其他默认值(保持生成示例项目代码选项已选中)并单击完成按钮.
成功创建项目后,您将在项目浏览器中获得以下内容 :

以下是所有重要文件夹的简要说明
| Sr.No. | Folder &安培;位置 |
|---|---|
| 1 | src 源代码(java类)文件. 客户端包含负责客户端UI显示的客户端特定java类的文件夹. 包含负责服务器端处理的服务器端java类的服务器文件夹. 包含java模型类的共享文件夹,用于将数据从服务器传输到客户端,反之亦然. HelloWorld.gwt.xml,GWT编译器编译HelloWorld项目所需的模块描述符文件. |
| 2 | 测试 测试代码(java类)源文件. 包含负责测试gwt客户端代码的java类的客户端文件夹. |
| 3 | 战争 这是最重要的部分,它代表了实际可部署的Web应用程序. 包含已编译类,gwt库,servlet库的WEB-INF. HelloWorld.css,项目样式表. HelloWorld.html,热门HTML将调用GWT UI应用程序. |
GWT插件将创建一个默认模块描述符文件 src/com.it1352/HelloWorld.gwt.xml 如下.对于此示例,我们不会对其进行修改,但您可以根据您的要求对其进行修改.
<?xml version = "1.0" encoding = "UTF-8"?>
<module rename-to = 'helloworld'>
   <!-- Inherit the core Web Toolkit stuff.                        -->
   <inherits name = 'com.google.gwt.user.User'/>

   <!-- Inherit the default GWT style sheet.  You can change       -->
   <!-- the theme of your GWT application by uncommenting          -->
   <!-- any one of the following lines.                            -->
   <inherits name = 'com.google.gwt.user.theme.clean.Clean'/>
   <!-- <inherits name = 'com.google.gwt.user.theme.chrome.Chrome'/> -->
   <!-- <inherits name = 'com.google.gwt.user.theme.dark.Dark'/>     -->

   <!-- Other module inherits                                      -->

   <!-- Specify the app entry point class.                         -->
   <entry-point class = 'com.IT屋.client.HelloWorld'/>

   <!-- Specify the paths for translatable code                    -->
   <source path = 'client'/>
   <source path = 'shared'/>

</module>
GWT插件将创建默认样式表文件战/HelloWorld.css 的.让我们修改这个文件,让我们的例子保持最简单的低估 :
body {
   text-align: center;
   font-family: verdana, sans-serif;
}

h1 {
   font-size: 2em;
   font-weight: bold;
   color: #777777;
   margin: 40px 0px 70px;
   text-align: center;
}GWT插件将创建默认值HTML主机文件 war/HelloWorld.html .让我们修改这个文件,让我们的例子保持最简单的低调 :
<html>
   <head>
      <title>Hello World</title>
      <link rel = "stylesheet" href = "HelloWorld.css"/>
      <script language = "javascript" src = "helloworld/helloworld.nocache.js">
      </script>
   </head>

   <body>
      <h1>Hello World</h1>
      <p>Welcome to first GWT application</p>
   </body>
</html>
您可以在同一源目录中创建更多静态文件,如HTML,CSS或图像,或者您可以创建更多子目录并在这些子目录中移动文件目录并在应用程序的模块描述符中配置这些子目录.
GWT插件将创建一个默认的Java文件 src/com.it1352/HelloWorld.java ,它保留了应用程序的入口点.
让我们修改此文件以显示" Hello,World!"
package com.it1352.client;

import com.google.gwt.core.client.EntryPoint;
import com.google.gwt.user.client.Window;

public class HelloWorld implements EntryPoint {
   public void onModuleLoad() {
      Window.alert("Hello, World!");
   }
}
您可以在同一源目录中创建更多Java文件,以定义入口点或定义帮助程序例程.
准备好完成所有更改后,就可以编译项目了.使用选项 Google Icon ![]() > GWT Compile Project ... 启动GWT Compile对话框,如下图所示 :
> GWT Compile Project ... 启动GWT Compile对话框,如下图所示 :
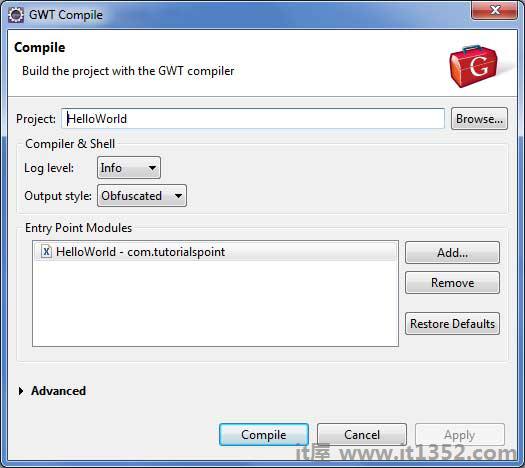
保持默认值不变,然后单击"编译"按钮.如果一切顺利,您将在Eclipse控制台中看到以下输出
Compiling module com.it1352.HelloWorld
   Compiling 6 permutations
      Compiling permutation 0...
      Compiling permutation 1...
      Compiling permutation 2...
      Compiling permutation 3...
      Compiling permutation 4...
      Compiling permutation 5...
   Compile of permutations succeeded
Linking into C:\workspace\HelloWorld\war\helloworld
   Link succeeded
   Compilation succeeded -- 33.029s
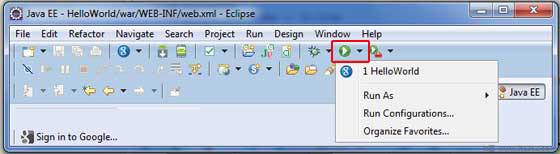
现在点击![]() 运行应用程序菜单并选择 HelloWorld 应用程序来运行应用程序.
运行应用程序菜单并选择 HelloWorld 应用程序来运行应用程序.
如果一切正常,你必须看到GWT开发在Eclipse中激活的pment模式包含一个URL,如下所示.双击URL以打开GWT应用程序.
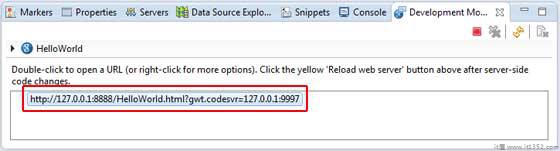
因为您在开发模式下运行应用程序,所以您需要为浏览器安装GWT插件.只需按照屏幕上的说明安装插件.
如果您已经为浏览器设置了GWT插件,那么您应该能够看到以下输出
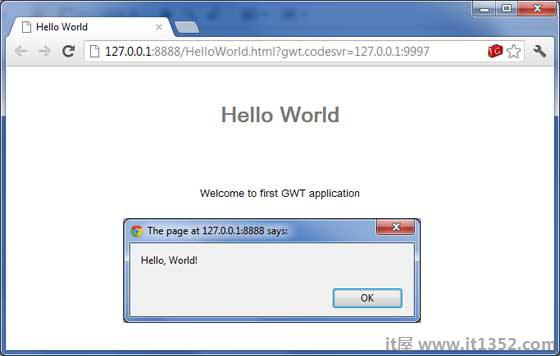
恭喜!您已使用Google Web Toolkit(GWT)实施了第一个应用程序.